Stop Stammering

It’s going to take me forever to finish reading The Innovator’s Mindset. George Couros continues to provide examples of innovation in education, which forces me to put down the book and look something up on the computer. In chapter 2, he refers to the television reality series, Educating Yorkshire, in which Musharaf Asghar overcomes a stammering disability with the help of his teacher. Mr. Burton tries a technique he saw in The King’s Speech, a film starring Colin Firth. Watch the video below to witness this incredible journey.

According to Merriam-Webster, stammer means: to make involuntary stops and repetitions in speaking. I think back to my first few…maybe 10, years of teaching. I found myself repeating the same techniques and strategies that didn’t work over and over again, just like a stammer. I was burying my students in ineffective worksheets and isolated activities on a daily basis. Now, in my defense, this was way before the era of technology integration. All we had were pencils and a Xerox machine. But, we did have our minds. Why wasn’t my mind working back then to be innovative when it came to delivering content and meeting the needs of all of my diverse learners? I have often said during trainings that I wish I could contact my first few classes and apologize for how terrible I was as their teacher.

Now, as a technology specialist, my job is to train teachers on how to use technology to support the curriculum. I’m realizing that technology can be just a fancy, pancy substitution for pencils and Xerox machines. It’s not about the tools you have at your disposal. It’s about your innovative mindset.

I get it. Do you?

App Flows Aren’t Just for iPads Anymore

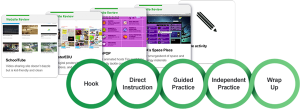
Graphite App Flows (Now called Lesson Flows from Common Sense Media) were something I discovered a couple of years ago. A Lesson Flow is a lesson planning framework that helps you integrate digital tools with pedagogical insight. They helped teachers in my district move away from unstructured “skill and drill” use of the iPad to a purposeful lesson that made students accountable for their time spent on the device. 

Since then, app developers have realized that districts purchase multiple types devices, not just iPads. Many popular productivity iPad apps now have an online alternative. This allows for more flexibility when teachers are planning and checking out iPad, Chromebook, laptop carts or scheduling time in the computer labs. Here is a list of some of my favorite apps that now have a web based counterpart.

G-Suite                              Thinking Blocks         
Thinglink Haiku Deck
SeeSaw Virtual Manipulatives
Book Creator Learnzillion
Google Earth Math Learning Center
Google Maps BrainPop
Canva Educreations
Nearpod Padlet
Edublogs Popplet
Google Classroom Snapguide
Quizlet Animoto
YouTube

In my district, elementary teachers usually have about 3-4 iPads per classroom. That’s all fine and dandy if your lesson is designed to be in a workstation or center. It’s also difficult to manage multiple users logging into different accounts on 1 device. That may be a simple task for secondary, but try that with a kindergartener. Turning your App Flow into a Web/App Flow may be your solution. It’s the same lesson using the same resources, but now you have a choice of which device you would like your students to use. I just finished this one to support 4th grade Equivalent Fractions. Here is the link if you would like to use or modify it to fit your needs: https://goo.gl/t5devp


Using HyperDoc Format for Unit Reviews

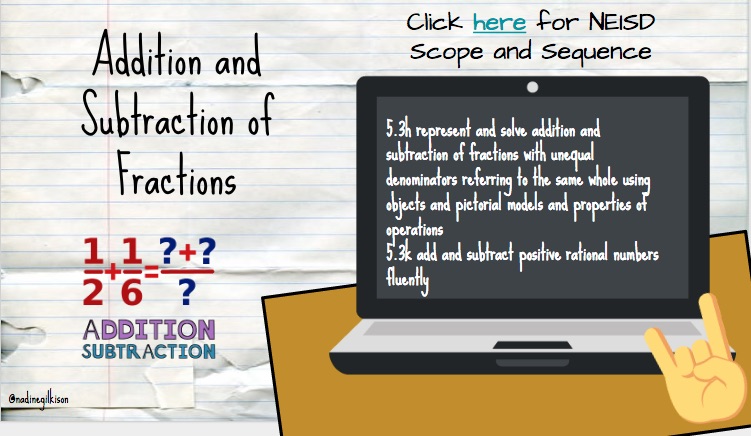
It’s that time of year again in Texas (Insert sigh). Reviewing for the STAAR exam does not need to be a painful process. Instead of the traditional STAAR formatted worksheet, try a HyperDoc full of engaging multimedia content. I’ve created a template, examples, and even a list of multimedia resources to help make the creation process less time consuming. 

For the past 6 weeks, I have been tutoring a group of 5th grade math students. They handed me a binder that is literally 3 1/4 inches thick. Yes, I measured. The tree hugger in me had a little tiny stroke. That’s what inspired me to turn this binder full of worksheets into engaging HyperDocs using a template created by Nadine Gilkison (@nadinegilkison). The content in these HyperDocs is not my intellectual property. It belongs to my district, so the privacy settings require end users to be logged into their district NEISD Google account.

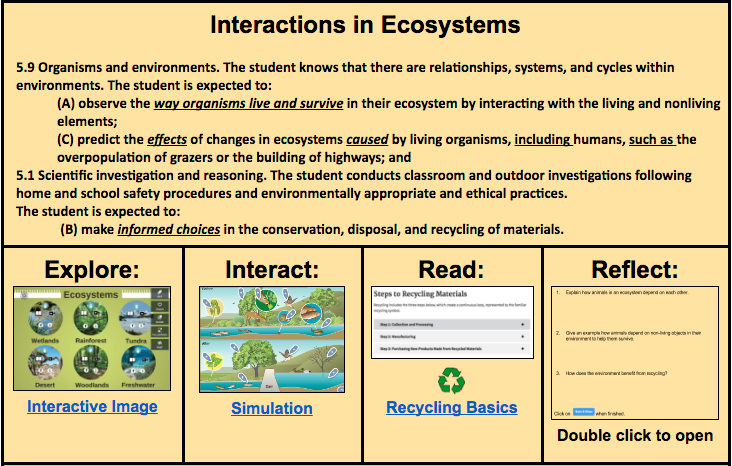
I created another Science Review HyperDoc that supports all of the 5th grade Life Sciences TEKS. This one is open to the public, so please feel free to make a copy and modify to fit your needs. It is filled with multimedia content to support over 8 TEKS. It also includes a reflection component (Google Drawing) where students answer essential questions.

I really liked the flow of the format and the fact that teachers can choose which sections students need to focus on based on assessment results and benchmark data. It’s also great for differentiation. You may have some students that need to focus on Interactions in Ecosystems, while others need to focus on Life Cycles. HyperDocs, by nature, are designed to be self-paced to accommodate the different needs of individual learners. 

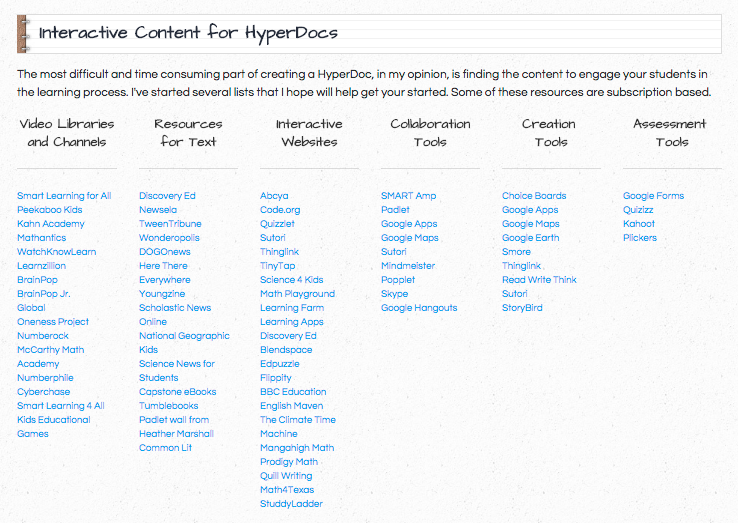
If you are interested in creating a HyperDoc Unit Review for your class, you can use this template to help get you started. I’ve also curated some of my favorite resources that can be embedded within the activity.


Take a Tour of the New Teleport 360° App

If you are a regular reader of this blog, you know I obsess over certain tools I love. Thinglink is probably number 1 on my list and it just got even better! Last year, I participated in the Thinglink Summer VR Challenge and was introduced to their new 360° tag editor for making 360° images and VR content interactive. This particular feature of the platform is only available if you have a Premium Educator account. When I provide professional development opportunities for my teachers, I usually do not recommend purchasing individual subscriptions because I know that the money comes out of their pockets. This is one exception.

Thinglink is not just a tool. It is a supportive community designed to provide teachers with rich, interactive experiences that engage learners and immerses them into worlds they may not possibly be able to experience otherwise. When I see teachers and students using Thinglink to annotate content that demonstrates understanding of concepts, they are giddy. Seriously. Giddy. One of my favorite bloggers, Richard Wells (@EduWells), recently published a post about the impact of virtual reality in the classroom and how it can encourage empathy.

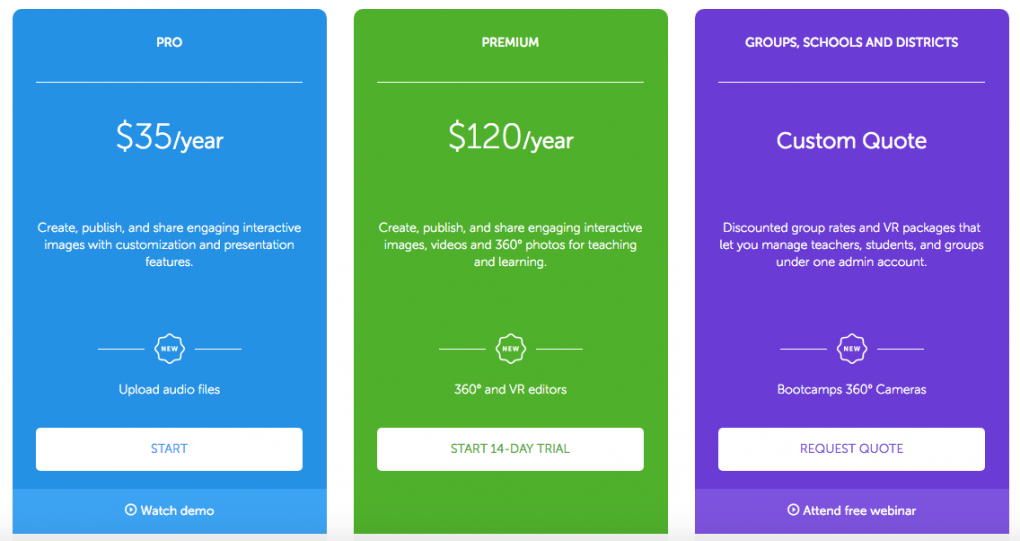
Below are the Thinglink current pricing options.


I recommend starting with the free 14 day trial so you can see for yourself how easy it is to navigate the interface. If the out of pocket cost is not an option, try approaching your campus administration or PTA/PTO for funding. Many campuses have even used allocated grade level or department funds.

One thing I struggled with as a new user of this feature was learning about 360° images, specifically where to get them and how to make your own. I’ve tried several apps and continue to go back to the same one: Google Street View on my iPhone. Here are the simple directions:

Create photos with an iPhone (Won’t work with an iPad because it won’t save to camera roll)

  1. Open the Street View app .
  2. Tap Create +.
  3. In the bottom right, tap Camera Take photo.
  4. Take a series of photos.
  5. At the bottom, tap Done Done.
  6. Your 360 photo is stitched together and saved in the “Private” tab on your phone. The photo is also saved on your phone (unless you turned this setting off).
  7. Publish your 360 photo on Google Street View (you can blur faces or identifying information if needed)

Upload Image to Teleport 360° app on your iPad

  1. Open Google Street View on your iPad.
  2. Navigate to your public image and save to your camera roll.
  3. Open Teleport 360 and tap on Upload Media
  4. Tap Photo Library and tap on your 360 image
  5. Tap edit and start tagging using text, images, audio, video, embed html, or transitions

 Here’s a quick video to show how easy it is to use:


If you would like to take your class on an immersive learning adventure to a specific destination, check out the photo pool from the Flickr 360 Equirectangular Group. Many photographers have given permission for their images to be used. Kathy Schrock’s Guide to Everything (and I mean EVERYTHING) also has a wealth of information and resources on the subject of virtual reality. Also, within the app itself is a growing collection of their own 360° image library.

Check out the Spotlight Speakers 17 Channel created by Susan Oxnevad (@soxnevad) to see examples of how educators are using this tool to support instruction.

Happy Tagging!


Reflecting on 2016

As the end of the year quickly approaches, I often reflect on what I have accomplished and what I would like to set as my goals for the new calendar year. This year, you may have noticed I did not publish as many posts as I normally do. This is largely due to the fact that I have been working on 2 other websites. I’m happy to say they are both complete and now it’s just a matter of updating them with fresh content to replace older apps and software. I decided to showcase some of the new lessons and ideas that are now posted on these sites.

Rock the Lab

Rock the Lab is a website I maintain for student use. All of the lessons support Texas TEKS and follow the NEISD Scope and Sequence. It took me a year to build, but I finally have all 4 nine weeks complete. Most of the activities utilize free tools, but some require a subscription or license to paid content/software such as Kidspiration or Discovery Education. Every school year I pick out a new tool or website over which to obsess, and this year it was HyperDocs! I’ve tried to incorporate as many as I could in each 9 weeks and the feedback from students and teachers has been very positive. Check out some of my favorite lessons below:

Schoogle Your Content with HyperDocs

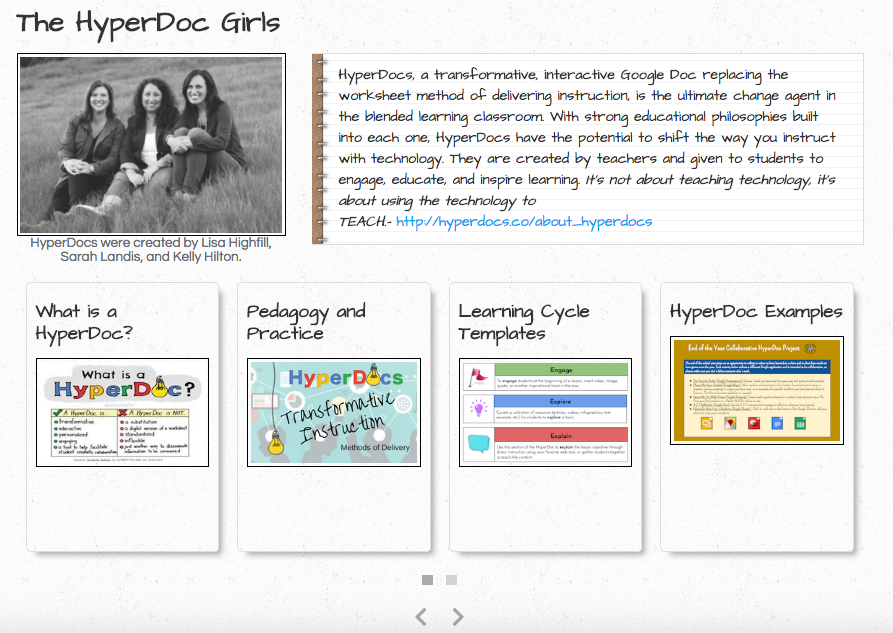
As I stated above, my obsession this year has been HyperDocs. I learned about them last year through Matt Miller’s blog post and never looked back. I love them so much that I decided to abandon my fear of public speaking and present on the subject at TCEA in February. I created a site to share what I learned this summer during the HyperDoc Bootcamp, and to house my growing collection of examples created by myself and the HyperDoc community.

screen-shot-2016-12-01-at-11-57-18-am


Click on the arrows at the bottom of the home page to navigate through the content. Start at the beginning if you are new to HyperDocs or skip straight to the examples if you’re ready to implement. I hope you will be able to attend my session on Wednesday, Feb. 8 from 5:00-6:00.

screen-shot-2016-12-01-at-12-02-52-pm

Thinglink 360/VR 

Dare I say, Thinglink is still my number 1 go to tool for student created projects. This year they introduced a new feature that supports 360 images. I was fortunate enough to be able to create content for their new iPad app. Students can explore 360 images and interact with multimedia content to learn about different places or concepts. 2 of my lessons are now featured within the app: Earth’s Forces and Remember the Alamo!

Creative Writing Challenges

This year I’ve chosen creative writing as an instructional focus. Here are some HyperDocs that have a seasonal or monthly theme. 

PD in Your PJs

Can’t come to a training? No worries! Below are links to resources that provide you with anytime, anywhere, self-paced learning.

Goals for 2017

What does 2017 look like? At the rate things are changing, I have no idea yet. When you’re in this profession, tools are being developed at the drop of a hat. One thing I have learned is good teaching will never change. I think that’s why I fell so hard for HyperDocs. It’s not about the platform or the device. It’s about sound instruction that allows the student to engage with the content. Therefore, my goal for 2017 is simple…best practices.

Comparing Virtual Spaces for Curation

Showcasing student work is a vital part of the content creation process. I’m constantly looking for the easiest way to curate examples or have students submit work without having to login to yet another account. My usual go-to tool is Padlet, however, sometimes it does not play nice with some of the tools I work with. Here is a specific example:

Screenshot of Voki uploaded to Padlet.

Screenshot of Voki uploaded to Padlet.

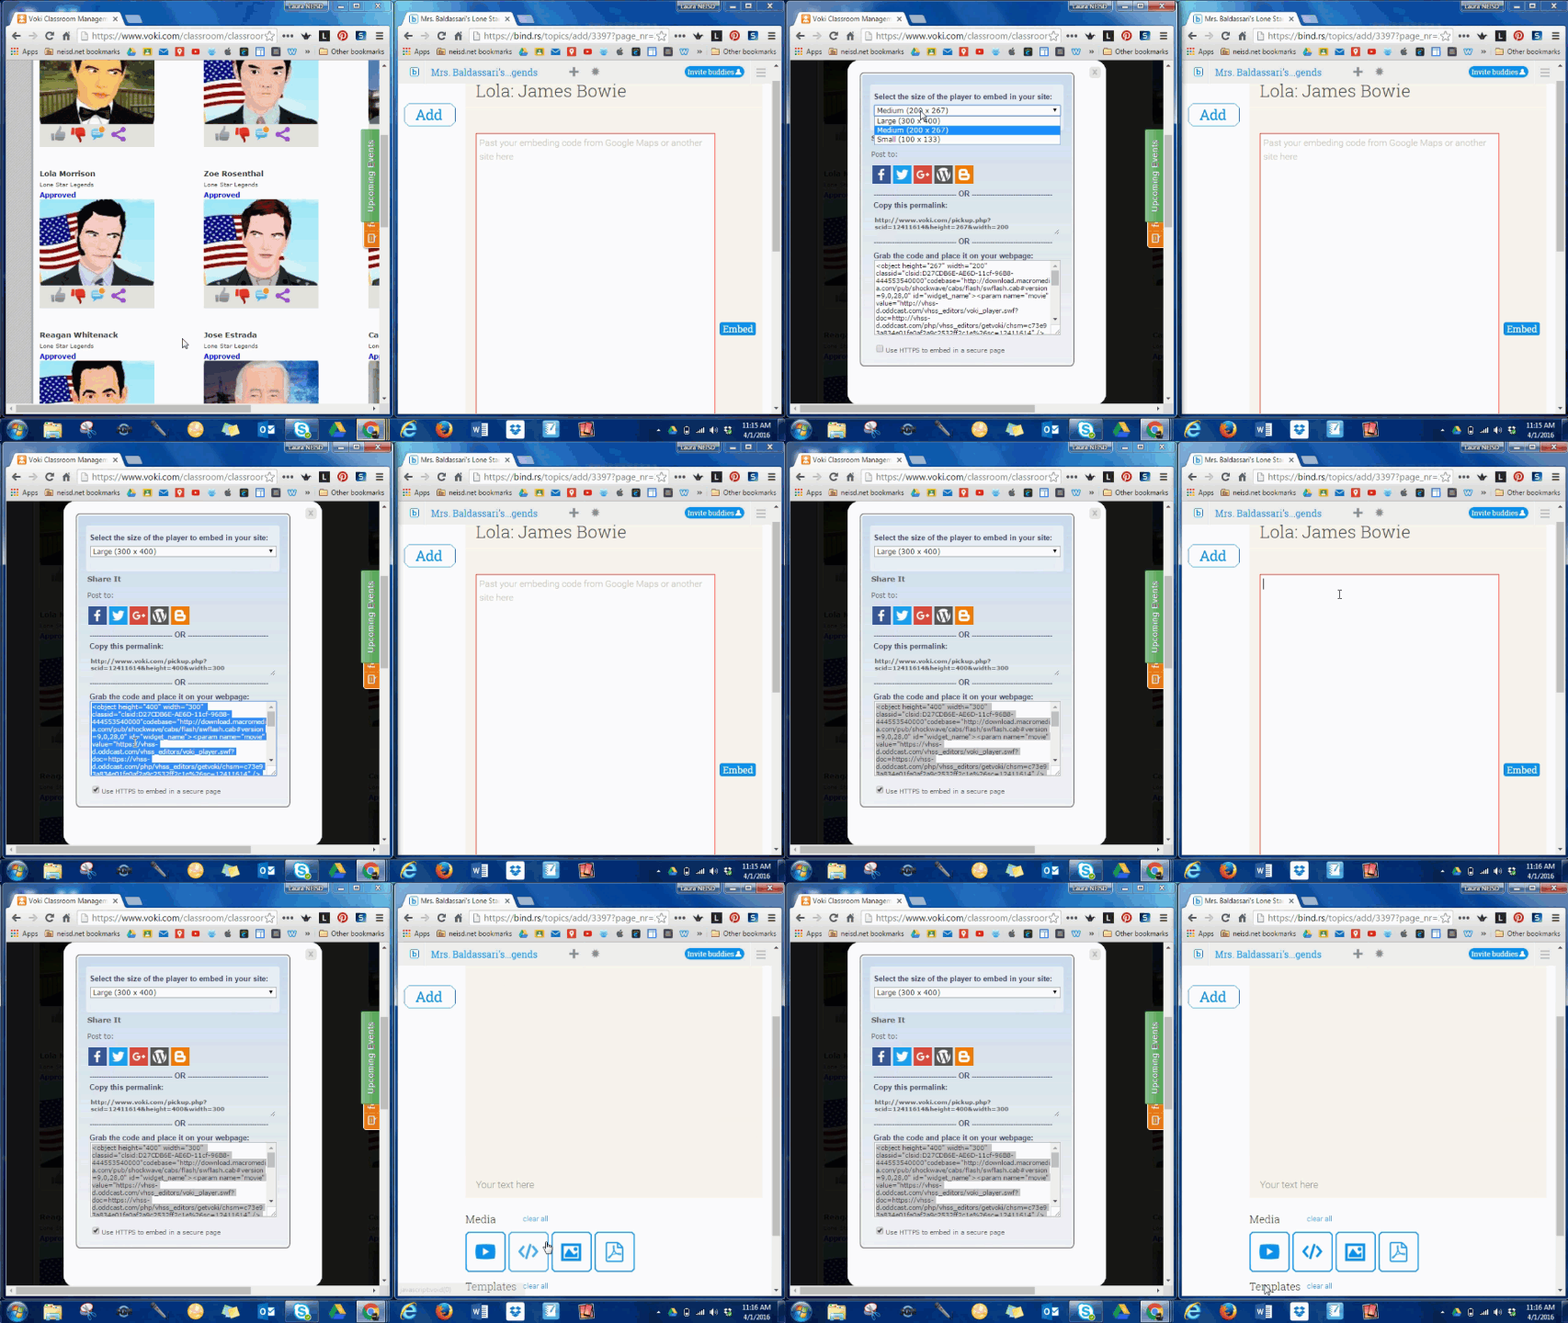
Recently, Sherry Philippus, librarian at Northwood Elementary, had her 4th grade students create Vokis on Lone Star Legends. She needed a way to embed them all in one place, but Padlet would not embed or link to the original Voki. Bindrs is a website I discovered about a year ago when looking for a way to curate Thinglinks along with a written description for each example. When I tested embedding a Voki in a Bindr, it worked perfectly! I’m including a quick video showing how to make it work. You need to make sure to check the box that says               Use HTTPS to embed in a secure page.”

Voki and Bindrs

It would be wonderful if there were that one perfect tool that was compatible with all online platforms, but alas, it still eludes me. Here are the ones I use on a regular basis along with some comparisons of what I think are the most important features and examples. Hopefully this will help you match the perfect tool with your project.

Some additional information on the chart above:

  1. Logging in for elementary students can be very time consuming and distract from the content of the lesson. If a website does not offer the ability to sign in with their district Google account, it’s a deal breaker for me. I say move on and find something else.
  2. HSTRY, one of my most favorite sites ever, has new features in development. Here is what Thomas Ketchell shared with me the other day, “We will have collaboration integrated by the beginning of the next school year and hopefully the embedding of other content will be ready sooner than that over the next couple of months. You will be able to embed iframes and resources such as Thinglinks and Google Slides to a timeline!” I’m a happy girl.
  3. I included uploading files in my chart, however, with GAFE (Google Apps for Education) this feature may not be as necessary as some of the others. 
Posted in Uncategorized

Collaborative eBooks Using Book Creator

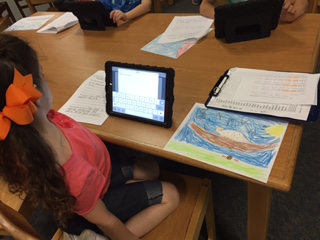
One of my all time favorite apps for student created products is Book Creator. Recently I worked with 2 IMG_4453of my campus librarians to complete a collaborative research project. Rosa Roberts (@RivitingReads) from Encino Park Elementary worked with all of the 1st grade students at her campus to learn about different animals that live at the San Antonio Zoo. This project was done before their field trip in order to build prior knowledge about the animals and how they interact with their natural environments. Before they used the Book Creator app, Rosa provided them with a research recording sheet so they could plan all of the components on their page. Each student added text, an image of the animal from Encyclopedia Britannica, and a picture that they drew of their animal living in their habitat. Once all of the pages were complete, Rosa and I combined them all on 1 iPad using Air Drop. 

Jennifer Oldham (@battyforbooks) from Cibolo Green Elementary helped me with a similar 2nd Grade research project on the different states that make up our country. Students learned how to add text, images and audio to complete their class ebooks. Below is a quick video that will walk you through the combination process. I did experience a couple of scenarios you may run into:

  • The iPads need to be on the same network in order for Air Drop to work. (Either iTouch or WPA2)
  • You may want to turn Air Drop off with the exception of the 2 you are working with. Otherwise, it gets confusing as to which device you want to select for transfer.
  • Make sure you are aware that the free version of Book Creator allows for the creation of only 1 book, however, you can add as many pages as you need. Fortunately, all of our campus librarians have the paid version. Please contact them if interested in co teaching a lesson.


Facilitate Interactive Learning Adventures Using Thinglink, Hyperdocs and App Flows

The Internet can be a very overwhelming place for young students. There are many kid friendly search engines and databases, but they still provide a large amount of information that may or may not aid in accomplishing learning objectives. Collecting resources ahead of time and placing them in an appropriate container can be a huge time saver when students are asked to create projects. Over the past couple of years I’ve been tinkering with this idea and have gotten many great ideas from fellow educators online. 

app-flows-landingMy first example to share is the app flow framework that I found on Graphite. An app flow (now known as Lesson Flow) is an interactive framework tool that enables teachers to seamlessly flow apps, websites, and games throughout lessons. This gives students guidance and the ability to complete a purposeful lesson independently in a workstation, thus giving the classroom teacher the opportunity to work with individuals or small groups. I have some examples below for 4th and 5th grade Math.

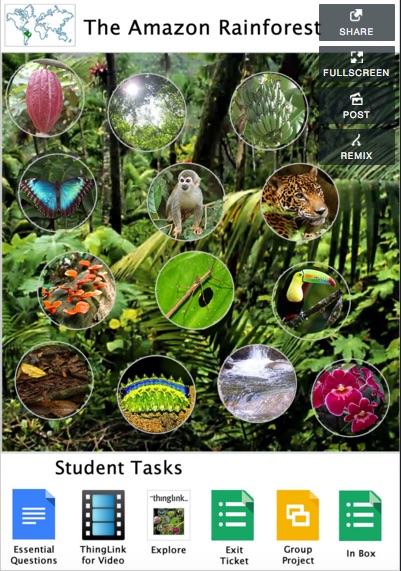
Susan Oxnevad, Thinglink Education Community Manager, is a master of creating interactive learning thinglinkadventures using Thinglink. She has inspired many through her countless examples. My favorites are her interactive images combined with Google apps. Click here to check out her latest blog post that includes presentation resources from EdTechTeacher Innovation Summit. Thinglink allows teachers and students to create interactive images that contain embedded multimedia content. It has become my favorite online tool because of its ease of use and cross-curricular implications. Here are a few examples that will hopefully inspire:

Hyperdocs are new to me…kind of. Back in the day I used to use Word to create a hot list, but never really thought about using it as a framework for instruction. Earlier this week I read a Technotes blog post listing free Google Templates for Students. On that list was a resource from Lisa Highfill explaining Hyperdocs and giving several examples. To learn more, you can take the HyperDoc Tour. This really made me think about how I can utilize the functionality of multiple Google Apps in one lesson. Below are some excellent examples from Lisa’s post:

Using digital tools to facilitate learning adventures is a great way to engage students in the lesson and allow students to progress at their own pace. It does require some preparation in advance on the part of the teacher, but fortunately there are many experts willing to share their creations. Hopefully this list will inspire you to create your own interactive learning adventure.


Beginning of the Year Survival Guide

53c5066be4b0af6d692cb7be

 Let’s Get Connected!

New Systems and Updates

Outlook and Lync

Student Login Information

  • Beginning August 20, 2015 ALL students K-12 will be using the following login credentials for Active Directory. First letter of your first name and up to 10 letters of your last name followed by the last 4 digits of the student ID number. The password will be the complete student ID number. Please login to the Employee Portal to access the Student Privacy Inquiry:  
    • username = jsmith3456  
    • password = 0123456
  • Student Login Printable
  • VDI Printable
  • Login Information for all Online Resources
  • Google Docs Login Information
    • Important Update: All new students must use the word “password” or “chromebook”  the first time they login to Google Docs. They may or may not be prompted to change their password. Please have them change it to “ne” and their full student ID # e.g., ne0123456)
    • K-3 teachers: you might want to login and do this for all of your students prior to your first lesson. 
    • Returning students will use the login information listed below:
      • For K-12 students, username:  username@stu.neisd.net (e.g., jsmith3456@stu.neisd.net)  password:  “ne” and your full student ID# (e.g., ne0123456)

Digital Citizenship

First Lab Lessons

Instructional Technology Support

Technical Support 

Network Support

Copyright, Fair Use and Creative Commons

wordle

What is Copyright, Fair Use and Creative Commons?

Read the following blog post about Copyright, Fair Use and Creative Commons, written by Ronnie Burt: The Educator’s Guide to Copyright, Fair Use, and Creative Commons

How do I cite a book or website?

Here is an example of an MLA citation format for a website using EasyBib:

Burt, Ronnie. “The Educator’s Guide to Copyright, Fair Use, and Creative Commons.” The Edublogger. Edublogs, 09 Feb. 2012. Web. 04 May 2015. <http://www.theedublogger.com/2012/02/09/the-educators-guide-to-copyright-fair-use-and-creative-commons/>.

How to cite a website using EasyBib:

How do I cite an image I found on the Internet?

First, you must search for the image’s Creative Commons attributes. There are many image libraries that will search for only those images that have permission to use and modify:

  • images.google.com – Click on “advanced image search” and then select for the “Usage Rights” dropdown, ALWAYS confirm that the images you find are actually licensed as you selected.
  • search.creativecommons.org – Allows you to search google and flickr for creative commons images, and several other search providers for non-image based content (try attaching “image of” or “stock photo” to your search terms.
  • pics4learning.com – A safe, free image library for education. Teachers and students can use the copyright-friendly photos and images for classrooms, multimedia projects, and more.
  • commons.wikimedia.org – More than 10 million categorized, photos, illustrations, footage, sound bites etc.
  • http://pixabay.com/ – Free high quality images you can use anywhere.
  • photosforclass.com – All downloaded images are stamped with citations at the bottom of the image.

Here is an example of an MLA image citation created using EasyBib:

OLYMPUS DIGITAL CAMERA“The Asiatic Lion” by Shanthanu Bhardwaj – The Asiatic Lion. Licensed under CC BY-SA 2.0 via Wikimedia Commons – http://commons.wikimedia.org/wiki/File:The_Asiatic_Lion.jpg#/media/File:The_Asiatic_Lion.jpg

How to cite an image using EasyBib

Can I embed video on my website or blog?

You are free to embed any video found on YouTube, Vimeo, SchoolTube, Watch Know Learn, etc. as long as it gives you an embed code. You can’t, however, with sites like Discovery Education since that contains paid content and requires login credentials.

How to embed a video from YouTube

The easiest way to cite a digital source is EasyBib. You will need to create an account, otherwise your citation will disappear in 3 days. There is also an easy to use Chrome extension already installed in your Chrome browser (if logged in with NEISD Google credentials).


What Will You Create Today?

The biggest obstacle teachers face when trying to integrate technology is time. There aren’t very many opportunities during the day to explore new tools, think of ways to use them with the curriculum, or actually sit down to write a comprehensive lesson plan. Plus, the implementation of Standard V just adds to the already existing high levels of stress. Fortunately, higher levels of technology integration promote student choice, which means less planning on the part of the teacher. Over the summer, I worked on some computer lab posters that will help guide students in choosing the right tool for their project, and support teachers in their efforts for easier ways to integrate. I chose the theme of a graphic novel (created using Comic Life) to bring a little adventure into the computer lab. The first poster is attached to the door of the lab and asks, “What will you create today?” This represents the cover of the graphic novel. When they enter, each page of the novel gives them ideas and tools to use to accomplish their task. I encourage all teachers to bring their mobile devices to the lab each week, as adding the component of a camera adds to the diversity of projects students have as options. 

This slideshow requires JavaScript.

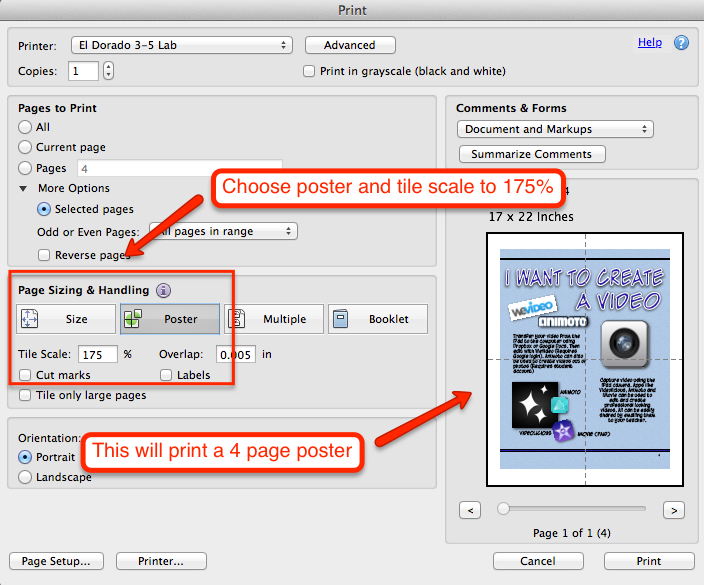
Many teachers may find this amount of freedom somewhat daunting, especially if they are unfamiliar with how to use the software, web tool or app. This provides the perfect opportunity to bring collaboration into your lessons. Allow students to work together to figure out how the tools work, and then let them teach the rest of the class. You can also utilize a QR code tutorial section where students can view videos for quick instructions. I’ve included a link below to the PDF version of the posters. There are some that are very NEISD specific, but hopefully they will inspire you to create more personalized versions for your own students. I’ve also included directions for printing them poster size.

printing poster