Wouldn’t it be Cool if…

… you could design a lesson any way you wanted without platform limitations?

The term App Smash was coined by Greg Kulowiec (@gregkulowiec), who shares much of his work and thinking on his website, The History 2.0 Classroom. After working with iPads for some time, he quickly realized the following, 

“Most processes couldn’t be completed with just one app.  While many apps slightly overlap in terms of functionality, there tends to be a few black holes in each app that require the use of another app to complete the process.”   

The same can be said for web based tools such as G Suite. In a perfect world, I would have the ability to embed content within a Google Doc. There are a few hacks you can use to embed a YouTube video, but it’s really not the same. When platforms allow you to work in conjunction with other platforms, then your “what if?” can become a reality.

Recently, Sutori announced a game changing addition to their product. You can now embed content created on other sites. Over the past few weeks NEISD Social Studies Specialist, Carly Dodd, and I have been collaborating on a project for 4th grade students using Sutori and my other favorite web based app, Thinglink. Many times when a platform has functional limitations, you have to reshape the learning objectives to fit the nature of the tool. What we noticed when designing this lesson was how the learning objectives came to the forefront because the tools had so many functionality options. Carly and I were able to frantically brainstorm ideas and we never once said, “This tool won’t allow us to do that.” We wanted to create a lesson where students could travel back in time to the year 1836 to see the Alamo before the infamous battle. Because we live in San Antonio, many students have visited with family or on school field trips. What most people from outside the state of Texas don’t realize is that only a very small portion of the Alamo still stands today. It’s located in the heart of downtown surrounded by tall buildings. Our learning objective was for students to be able to tell us why the Alamo is an important landmark in Texas and the significance the battle had on the road to Texas Independence. This is where you meet our 3rd collaborator, the amazing James Boddie.

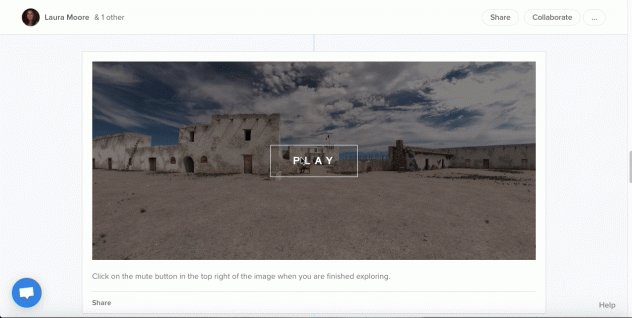
James has been working on an incredible project called Alamo 2.o. He’s using CGI technology to build a 3D model of the Alamo in 1836. This was the perfect background image to use with the Thinglink 360 video editor. I was able to upload his 360 image and annotate it with additional 3D content created by James. The end result is a totally authentic, immersive experience that makes you feel like you’ve traveled back in time.

Having the ability to embed this Thinglink resource allows content to be brought to the students. Everything they need to master these learning objectives can be found, for the most part, on one landing page, thus making Sutori the perfect vehicle to facilitate engaging experiences for students. Click here to view the lesson on the Sutori website. I’d like to thank Carly and James for collaborating with me on this project.

The Edtech Alphabet for Today’s Learners: 2017

It never fails. I make a video of how to navigate an interface or take screenshots of how to do something, and the developers immediately push out a new update. If there’s one thing I’ve learned in the world of Edtech over the years, it’s to be adaptable. Change is inevitable, so let’s teach students and teachers how to embrace it. My recent bout of insomnia made me think about all of the current tools, ideas, pedagogy and leaders in the field of Educational Technology that teachers should know about. I put together an interactive Thinglink image that will probably need to be updated every year. Some of the resources I tagged are here to stay, such as robotics, virtual reality and the 4Cs. I must admit, I’m looking forward to seeing how this image will change in 2018. Let me know what you think should be added or removed.

Thinglink Teacher Summer Challenge

Thinglink just announced they will once again facilitate a self-paced online summer teacher challenge. Every year that I participate, I learn new and innovative ways to utilize one of my favorite tools. This summer will focus on the use of their premium 360/VR feature. This is the perfect opportunity to try out this amazing platform for only $25.00 (normally $125.00). Below is an example of an interactive 360 image focusing on Science vocabulary.

Check out this post on their blog for more information about upgrading your account and signing up for the challenge. Hover over the tags in the image below to access task cards for each challenge.

Take a Tour of the New Teleport 360° App

If you are a regular reader of this blog, you know I obsess over certain tools I love. Thinglink is probably number 1 on my list and it just got even better! Last year, I participated in the Thinglink Summer VR Challenge and was introduced to their new 360° tag editor for making 360° images and VR content interactive. This particular feature of the platform is only available if you have a Premium Educator account. When I provide professional development opportunities for my teachers, I usually do not recommend purchasing individual subscriptions because I know that the money comes out of their pockets. This is one exception.

Thinglink is not just a tool. It is a supportive community designed to provide teachers with rich, interactive experiences that engage learners and immerses them into worlds they may not possibly be able to experience otherwise. When I see teachers and students using Thinglink to annotate content that demonstrates understanding of concepts, they are giddy. Seriously. Giddy. One of my favorite bloggers, Richard Wells (@EduWells), recently published a post about the impact of virtual reality in the classroom and how it can encourage empathy.

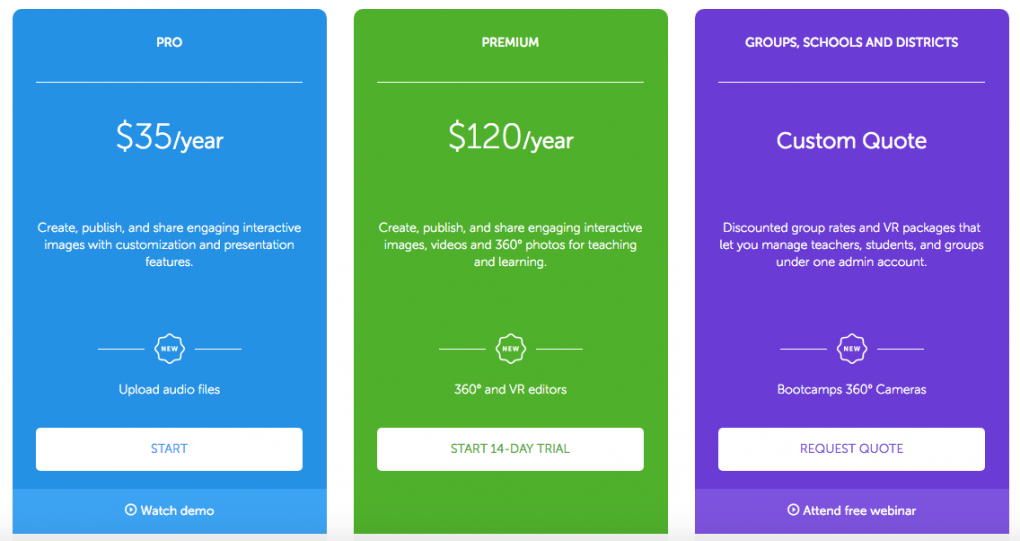
Below are the Thinglink current pricing options.


I recommend starting with the free 14 day trial so you can see for yourself how easy it is to navigate the interface. If the out of pocket cost is not an option, try approaching your campus administration or PTA/PTO for funding. Many campuses have even used allocated grade level or department funds.

One thing I struggled with as a new user of this feature was learning about 360° images, specifically where to get them and how to make your own. I’ve tried several apps and continue to go back to the same one: Google Street View on my iPhone. Here are the simple directions:

Create photos with an iPhone (Won’t work with an iPad because it won’t save to camera roll)

  1. Open the Street View app .
  2. Tap Create +.
  3. In the bottom right, tap Camera Take photo.
  4. Take a series of photos.
  5. At the bottom, tap Done Done.
  6. Your 360 photo is stitched together and saved in the “Private” tab on your phone. The photo is also saved on your phone (unless you turned this setting off).
  7. Publish your 360 photo on Google Street View (you can blur faces or identifying information if needed)

Upload Image to Teleport 360° app on your iPad

  1. Open Google Street View on your iPad.
  2. Navigate to your public image and save to your camera roll.
  3. Open Teleport 360 and tap on Upload Media
  4. Tap Photo Library and tap on your 360 image
  5. Tap edit and start tagging using text, images, audio, video, embed html, or transitions

 Here’s a quick video to show how easy it is to use:


If you would like to take your class on an immersive learning adventure to a specific destination, check out the photo pool from the Flickr 360 Equirectangular Group. Many photographers have given permission for their images to be used. Kathy Schrock’s Guide to Everything (and I mean EVERYTHING) also has a wealth of information and resources on the subject of virtual reality. Also, within the app itself is a growing collection of their own 360° image library.

Check out the Spotlight Speakers 17 Channel created by Susan Oxnevad (@soxnevad) to see examples of how educators are using this tool to support instruction.

Happy Tagging!


Technology Task Challenges for Teachers

Last week I attended TCEA 2017 in Austin and am currently working on a blog post to share my reflections. In the meantime, I stumbled upon this amazing resource created by Ron Burke (@MistaB10). His Twitter pic alone is worthy of its own blog post. Ron curated a plethora of technology challenges that allow teachers to explore new tools, choose tasks that are of interest, and provides examples of authentic integration. Where has this dude been all my life? Seriously. Check out his other interactive images here.

Reflecting on 2016

As the end of the year quickly approaches, I often reflect on what I have accomplished and what I would like to set as my goals for the new calendar year. This year, you may have noticed I did not publish as many posts as I normally do. This is largely due to the fact that I have been working on 2 other websites. I’m happy to say they are both complete and now it’s just a matter of updating them with fresh content to replace older apps and software. I decided to showcase some of the new lessons and ideas that are now posted on these sites.

Rock the Lab

Rock the Lab is a website I maintain for student use. All of the lessons support Texas TEKS and follow the NEISD Scope and Sequence. It took me a year to build, but I finally have all 4 nine weeks complete. Most of the activities utilize free tools, but some require a subscription or license to paid content/software such as Kidspiration or Discovery Education. Every school year I pick out a new tool or website over which to obsess, and this year it was HyperDocs! I’ve tried to incorporate as many as I could in each 9 weeks and the feedback from students and teachers has been very positive. Check out some of my favorite lessons below:

Schoogle Your Content with HyperDocs

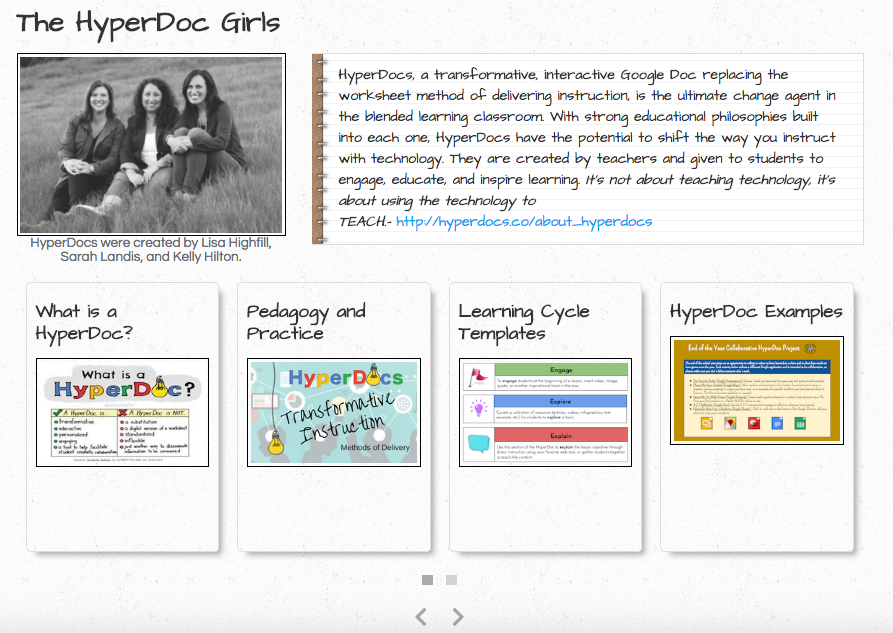
As I stated above, my obsession this year has been HyperDocs. I learned about them last year through Matt Miller’s blog post and never looked back. I love them so much that I decided to abandon my fear of public speaking and present on the subject at TCEA in February. I created a site to share what I learned this summer during the HyperDoc Bootcamp, and to house my growing collection of examples created by myself and the HyperDoc community.

screen-shot-2016-12-01-at-11-57-18-am


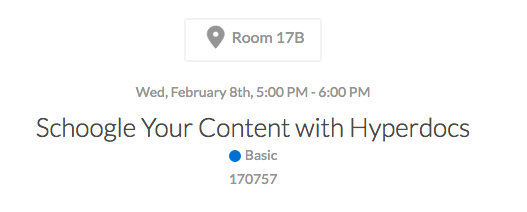
Click on the arrows at the bottom of the home page to navigate through the content. Start at the beginning if you are new to HyperDocs or skip straight to the examples if you’re ready to implement. I hope you will be able to attend my session on Wednesday, Feb. 8 from 5:00-6:00.

screen-shot-2016-12-01-at-12-02-52-pm

Thinglink 360/VR 

Dare I say, Thinglink is still my number 1 go to tool for student created projects. This year they introduced a new feature that supports 360 images. I was fortunate enough to be able to create content for their new iPad app. Students can explore 360 images and interact with multimedia content to learn about different places or concepts. 2 of my lessons are now featured within the app: Earth’s Forces and Remember the Alamo!

Creative Writing Challenges

This year I’ve chosen creative writing as an instructional focus. Here are some HyperDocs that have a seasonal or monthly theme. 

PD in Your PJs

Can’t come to a training? No worries! Below are links to resources that provide you with anytime, anywhere, self-paced learning.

Goals for 2017

What does 2017 look like? At the rate things are changing, I have no idea yet. When you’re in this profession, tools are being developed at the drop of a hat. One thing I have learned is good teaching will never change. I think that’s why I fell so hard for HyperDocs. It’s not about the platform or the device. It’s about sound instruction that allows the student to engage with the content. Therefore, my goal for 2017 is simple…best practices.

Thinglink 360/VR Summer Challenge

It’s summer! This time of year always gives me the opportunity to learn new skills, explore new tools, and collaborate with new people. Once again, I am participating in the Thinglink Summer Challenge. We will be exploring a new feature they recently added that allows you to upload and annotate 360 images. This is a great way to create engaging and immersive experiences for students. My first attempt was a virtual field trip to the Alamo that provided students with a guided tour and interactive activities that taught them about the significance of the battle during the fight for Texas Independence. I’ve created a channel to showcase the submissions from various Thinglink Expert Educators and teachers from around the country. I will continue to add on a weekly basis, so please check back often for more Thinglink inspiration. Make sure to join the Thinglink 360 Facebook page and visit the #Thinglink360 feed on Twitter. As Susan would say…Happy Tagging!

Wanna Go to The Alamo?

Talk about immersive experiences… The new Thinglink VR editor gives you and your students the opportunity to interact with 360-degree images and (coming soon) video. I thought I would give you a sneak peek of the image I will be discussing during the Interactive 360/VR Image Slam on Thursday, June 2nd. Sign up to view live at 8:00 pm EST or to receive a copy of the webinar in your inbox. You can also participate in the ThingLink Summer VR Challenge that begins on June 26. 

*Update*

Click on the video below to view the webinar that walks you through the image above (51:00). Check out all of the other great panelists for even more ideas on how to utilize 360 images. 

Explore this updated Bindr collection for even more inspiration.


NEISD Thinglink Challenge: Winter Traditions

You could say I have a slight fondness for Thinglink. I’ve spent the past 2 summers participating in the Thinglink Teacher Challenges facilitated by Susan Oxnevad. One of my professional goals this year was to try and replicate a similar challenge for our NEISD students and teachers. Last year we implemented the District Verified Organization offered by Thinglink Edu and have had great success in recruiting more users. This past winter we introduced our first ever district wide challenge. The goal was to create an interactive image explaining a winter tradition celebrated from anywhere in the world. It was open to all K-12 students and the grouping options included individual, pair, small group or whole class entries. We were hoping for a diverse group of submissions and that is exactly what we received. 5 interactive images were chosen from over 70 total entries. Before Spring Break, Cindy Gregory and I showcased the winning images by sharing screencasts of students explaining how the image was created and what they learned through this experience. The webinar can be viewed below.

View the channel below to see all of the great interactive images that were submitted for this challenge. We hope to have future Thinglink challenges, so please contact your campus ITS if you would like assistance getting started.

Facilitate Interactive Learning Adventures Using Thinglink, Hyperdocs and App Flows

The Internet can be a very overwhelming place for young students. There are many kid friendly search engines and databases, but they still provide a large amount of information that may or may not aid in accomplishing learning objectives. Collecting resources ahead of time and placing them in an appropriate container can be a huge time saver when students are asked to create projects. Over the past couple of years I’ve been tinkering with this idea and have gotten many great ideas from fellow educators online. 

app-flows-landingMy first example to share is the app flow framework that I found on Graphite. An app flow (now known as Lesson Flow) is an interactive framework tool that enables teachers to seamlessly flow apps, websites, and games throughout lessons. This gives students guidance and the ability to complete a purposeful lesson independently in a workstation, thus giving the classroom teacher the opportunity to work with individuals or small groups. I have some examples below for 4th and 5th grade Math.

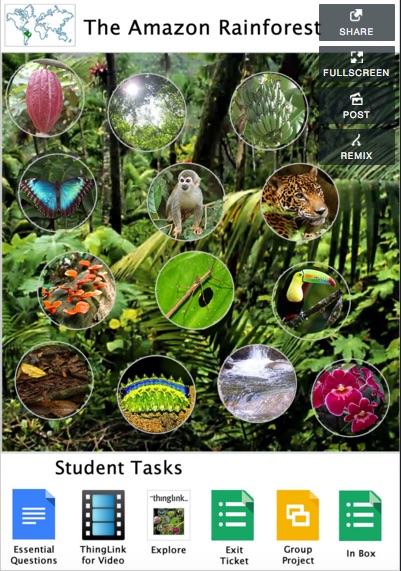
Susan Oxnevad, Thinglink Education Community Manager, is a master of creating interactive learning thinglinkadventures using Thinglink. She has inspired many through her countless examples. My favorites are her interactive images combined with Google apps. Click here to check out her latest blog post that includes presentation resources from EdTechTeacher Innovation Summit. Thinglink allows teachers and students to create interactive images that contain embedded multimedia content. It has become my favorite online tool because of its ease of use and cross-curricular implications. Here are a few examples that will hopefully inspire:

Hyperdocs are new to me…kind of. Back in the day I used to use Word to create a hot list, but never really thought about using it as a framework for instruction. Earlier this week I read a Technotes blog post listing free Google Templates for Students. On that list was a resource from Lisa Highfill explaining Hyperdocs and giving several examples. To learn more, you can take the HyperDoc Tour. This really made me think about how I can utilize the functionality of multiple Google Apps in one lesson. Below are some excellent examples from Lisa’s post:

Using digital tools to facilitate learning adventures is a great way to engage students in the lesson and allow students to progress at their own pace. It does require some preparation in advance on the part of the teacher, but fortunately there are many experts willing to share their creations. Hopefully this list will inspire you to create your own interactive learning adventure.