A Thanksgiving Timeline Via Google Earth

The following activity takes some VERY cool interactive websites and combines them with my absolute favorite web tool, Google Earth. At the bottom of this post is the KMZ file I created along with a printable copy of directions. Enjoy!!!

To access the Google Earth tour:

  • Students login to Active Directory and open Google Earth
  • Go to File>Open and navigate to the Student Shared Drive
  • Click on the KMZ file named A Thanksgiving Timeline (teachers need to save the KMZ file to the student shared drive prior to teaching the lesson.)
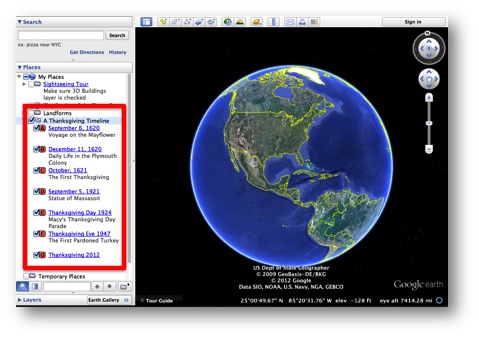
  • You will see the tour on the left side of the screen. There are 7 place marks total with information and links to online activities.

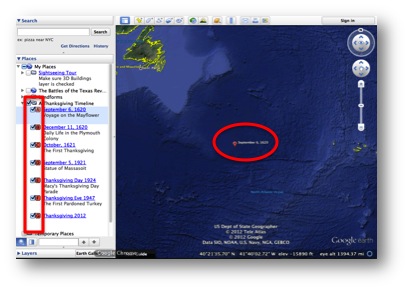
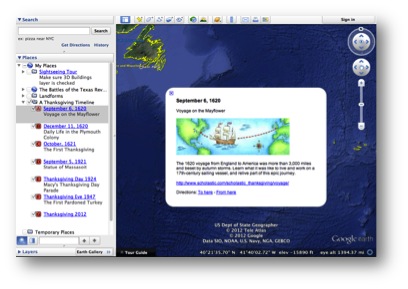
  • Double click on the red letter in the left pane to advance to each location. Double click on the red letter in the center to view the content within the placemark.

  • Advance through each placemark while completing each interactive until students reach the final destination where they describe family customs and traditions celebrated by their own families.
  • Students can document their learning by filling out a timeline graphic organizer or they can directly comment inside each placemark by right clicking and choosing properties. This will open the placemark for editing purposes. When complete, simply right click on the Thanksgiving Timeline folder located in the left panel and choose Save As.

The following links are possible extension activities:

A Thanksgiving Timeline KMZ (Google Earth File)

A Thanksgiving Timeline Directions

Free Digital Timeline Maker

A Thanksgiving Timeline Recording Sheet

Digital SSR Symbaloo Style

One of my goals this year is to create authentic and productive uses for student desktop computers in all classrooms. I got the idea of Digital SSR from the Teaching the iGeneration workshop taught by Bill Ferriter and combined it with one of my new favorite tools, Symbaloo. It’s not exactly intuitive, so I’ve created a little tutorial for guidance:


Interested in making a webmix of your own? Here are directions. Symbaloo-user-guide


Snapguide Now Offers Embedding

What is Snapguide?

Snapguide is a free iOS app and web service for those that want to create and share step-by-step “how to guides.” The service provides easy to understand instructions for a wide array of topics including cooking, gardening, crafts, repairs, do-it-yourself projects, fashion tips, entertaining and more. Educators are now utilizing this tool to deliver content and assign engaging student-created projects that promote collaboration and 21st century technology skills.

This site has recently made it very easy to share teacher or student created guides. Just copy the embed code in the HTML section of your blog or Teacher Web. Check out how to create a book using iBooks Author.

Check out How to Create an Interactive Book With iBooks Author by Timothy Brown on Snapguide.

An Explanation of NEISD Directories

This wonderful explanation of various NEISD drives comes from Teresa Brown, NEISD ITS:

Staff Shared: a repository for documents and files that an entire staff, committee, group or grade level needs access to. Not a place for your personal files since all staff members have access. Meant for short to mid-range storage. When something is no longer needed or out of date, please delete it.

Personal Drive: Each staff member and student has their own.This is where you and your students keep files for the long-term. Only accessible and editable by the owner. I recommend this location as the best spot for students to save their work. Personally, I keep anything that I have also shared in staff shared or student shared here as well b/c things are deleted from shared drives unintentionally all the time and computers crash. This is the only place that your files are truly secure and backed up (once a week by the district). Students can save to their personal drives and you can access their work.  See attachment for how-to’s.

Student Shared: It is nice and clean now, let’s keep it that way. There is a folder for each grade level. This is where you store (short-term) files, templates, hotlists, web page shortcuts, etc. that your students need access to. Everything should be in grade level folders. You can decide as a grade level how you want to organize your grade level folder, perhaps by subject matter or by teacher. Your choice. Once students have completed the units, please delete the templates to keep the folders uncluttered for student use. Students should not have to dig through multiple levels to get to a template. Not a place to keep your one and only copy of something. Students cannot save here.

Student Work Drop Folder: designed to be a place for students to turn in their work. Should be organized by grade level\teacher\student name if you choose to have kids save here, know that it is not secure. Other students can access, delete and modify work that is stored here. It requires more clicks for kids to save here than to their personal drives.

Below you will find a document that shows you how to access your students’ directories.

Accessing Student Folders

Find Free and Fair Use Photos and Music

Most teachers are now comfortable having their students create multimedia projects, but are still uncomfortable with the whole “copyright-fair use” guidelines that go with it. Grabbing an image from Google is easy, but how do you know if the owner of that image has given permission for it to be used? Fortunately there are many sites out there that make it easy for students and teachers to integrate technology on a regular basis. Using music and photos from these sources ensure that students are in compliance with the digital citizenship strand of NETS. …And yes, I’ve already checked to make sure they are not blocked by our new content filter.

To make it easy on students, save this Free and Fair Use Hotlist on the student shared drive for easy access.

Posted in Uncategorized Tagged

BOY Survival Guide


Welcome to the 2012-2013 School Year

Below you will find helpful resources for your 21st century learners.

New Technology Application Standards for Students K-2
3-5
Digital Citizenship Course Student
Teacher
Novel Login Card Templates Word Document
Link to SULU
Keyboarding Information Scope and Sequences
Device Connection Tutorials Docking Station Setup
Document Camera Setup
Device Usage Tutorials Moodle Link
First Lab Lesson Novell Student Checklist
Wordle
Computer Lab Procedures-PowerPoint
Parts of a Computer Notebook Lesson
Classroom Management Tools in Notebook Classroom Management
School Rules and Procedures


There are 2 technical changes you need to be aware of this year. If you are unable to access the Internet you may need to disable your proxy settings. Also, NEISD has a new content filter system called LightSpeed. See images below for details.


1. Click on Start > Settings > ControlPanel 
and double-click on Internet Options.

2. Click on “Tools Internet Options”.

3. Then click on the “Connections” tab.

4. Click on the “LAN Settings…” button.

5. Uncheck bottom box

6. Click OK and OK.

7. Launch Internet Explorer or your preferred

browser to access the Internet.

Staff will be able to override
blocked sites for a limited time. When you

see this screen, click on “Not You?”

located in the upper left hand corner of the

screen and log in with your Novell credentials. 


Google Search Education

This little tid-bit came from our very own Google Certified Teacher and fellow ITS, Susan Reeves:

Google has released a new site for teachers with resources covering the many ways to effectively utilize Google search tools with students. The resource is targeted more for secondary teachers and librarians and includes comprehensive lesson plans, taped webinars and modules on queries, power searching, assessing and evaluating web resources, Google Scholar, Creative Commons and Google Maps:

Click on the image below to find out more or click here: http://www.google.com/insidesearch/searcheducation/

Posted in Uncategorized

Windcrest Kinders Travel to Africa

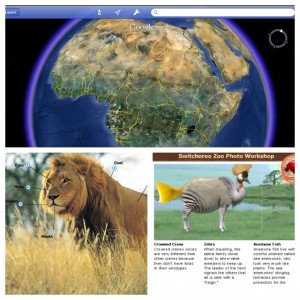
During the week of April 16, the Kindergarten at Windcrest Elementary used Google Earth to travel to Africa in search of animal adventure. Our first destination was Lion Park, South Africa. They used their “binoculars” to get a close up look at a lion’s body parts and how they help him survive in the wild. Then they used Switchzoo to create an animal of their own and design a habitat to support its basic needs.


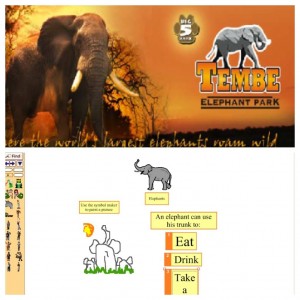
Our second destination took us to Timbe Elephant Park where we learned how the elephant uses his trunk in various ways. The students completed a Kidspiration activity where they used their “trunk” to paint a picture like a very special elephant from Thailand.


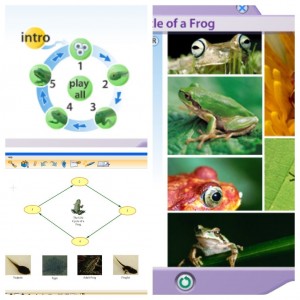
Our final destination was Cameroon, Africa, home to the world’s largest frog. We learned what a frog looks like during each stage of his life cycle by viewing an interactive tutorial from Harcourt School.


While visiting each location in Africa, the students filled in their research using a Passport. Below you will find the Google Earth KMZ and Passport used in this virtual field trip. Other Google Earth virtual field trips can be found on my Teacher Web. Please let me know if you are interested in creating a virtual field trip for your grade level.

Kinder Safari

kinder vft passport


SAILOn Provides One-Stop Shopping for Interactive Lessons

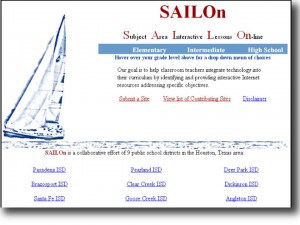
SAILOn is a collaborative effort of 9 different school districts in the Houston area. Their goal is to help classroom teachers integrate technology into the curriculum by identifying and providing interactive Internet resources addressing specific objectives. When you navigate to your particular grade level, you will find a plethora of interactive resources that support all content areas. These resources can be used as a way of introducing a topic or reinforcing skills through workstations in your classroom or lessons in the computer lab.
They don’t have an interactive activity for every single TEK…yet. It looks like something they are continually updating. If you find an activity that you would like to use with your students and need an extra set of hands, please let me know. I can also help you create some task cards and recording sheets for use in a workstation.
I hope you find this as useful as I do:)

3D Digital Storytelling with ZooBurst

ZooBurst is a digital storytelling tool that lets anyone easily create his or her own 3D pop-up books. Using ZooBurst, storytellers of any age can create their own rich worlds in which their stories can come to life.

The Rainforest by Marshall, Alan, Mary, and Sayali in Mrs. Oswald’s Class

ZooBurst books ‘live’ online and can be experienced using nothing more than a web browser running the Adobe Flash plug-in. Authors can arrange characters and props within a 3D world that can be customized using uploaded artwork or items found in a built-in database of over 10,000 free images and materials.

Once constructed, books can be inspected from any angle from within a 3D space, and rotating around a book is as easy as dragging and dropping a mouse. In addition, authors can choose to make items “clickable,” allowing readers to learn more about individual characters within a story. Each character can have its own ‘chat bubble’ that pops up when that character is clicked. In addition, authors can also record their own voices using the ZooBurst audio recorder to have their characters really ‘speak’ when clicked!

Readers can choose to experience and participate in a ZooBurst book in a number of ways. Authors can share books with readers using a simple hyperlink, and books can easily be ’embedded’ in any website or blog, allowing authors to provide their own contextual framework to their stories. Authors can also maintain a moderated discussion forum for each book, providing a virtual space in which readers can interact with one another.

Readers who have a webcam installed on their computer can also experience any ZooBurst book in Augmented Reality. Once a book has been loaded, readers can click on the ‘Webcam Mode’ button at the top of the screen. This button will turn on their webcam and allow them to see themselves as though they were looking in a mirror. From here, visitors can hold up a special symbol to the webcam to watch as the book ‘flys’ out of the paper and into the room around them! In addition, Augmented Reality mode also allows readers the ability to interact with a book using simple gestures. For example, simply waving your hand in front of a book will allow you to turn its pages back and forth.

As an educational tool, ZooBurst provides students with new ways in which they can tell stories, deliver presentations, write reports and express complex ideas. ZooBurst contains a powerful ‘classroom management’ feature for teachers that lets them easily set up protected, safe spaces for their students. Teachers can assign usernames and passwords to their students without having to input any sensitive or personal information, and can manage and moderate student work in a protected environment.

The best way to learn more about ZooBurst is to give it a try! Click here to sign up for your own ZooBurst account – it’s free!

Taken from: About ZooBurst

Warning: You cannot create free student accounts. You can login as you and have your students create books (up to 10 per account).

The Teaching Channel


 The Teaching Channel is a great resource for teachers who are looking for successful ways to teach a particular concept. Teachers from all over the country are sharing what works best for them, and there are a plethora of good ideas to add to your bag of tricks. You can view videos without an account or create a free account to access their lesson planner, notebook, and the ability to follow your favorite teachers.

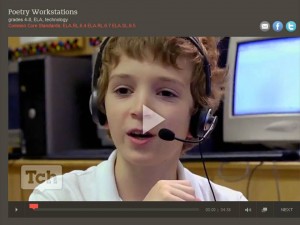
In this example, students analyze and explore poetry through a class blog and podcasting:

Poetry Workstations

Storybird for Collaborative Writing and Technology Workstations

Storybird is my new favorite Web 2.0 tool (except for Google Earth, of course) and have found alternative uses for it. This is the website’s great explanation of their concept:

What is Storybird?

Storybird is a service that uses collaborative storytelling to connect kids and families. Two (or more) people create a Storybird in a round robin fashion by writing their own text and inserting pictures. They then have the option of sharing their Storybird privately or publicly on the network. The final product can be printed, watched on screen, played with like a toy, or shared through a worldwide library.

Storybird is also a simple publishing platform for writers and artists that allows them to experiment, publish their stories, and connect with their fans.

How does Storybird work?

It’s simple. Someone starts a Storybird by writing a few words or grabbing a few images. Then the other person takes a turn, adding more words and pictures. In as little as one or two turns they can finish and share a Storybird. It’s that easy. And they can do it sitting side-by-side or across the country from each other.

http://storybird.com/faq/general/#what-is-storybird

I’m always trying to find new and innovative ways to use technology during centers or workstation times. Teachers can create their own digital instructions for activities in all subject areas in a matter of minutes. Giving students the freedom to choose the activity along with the option of how to present their products will enhance the learning experience.

Click here to see an example of a Storybird workstation activity:

Choose one of the following activities to complete in your workstation. You can record your answers in a Neo, Word Document or PowerPoint. on Storybird

Creating a free teacher account is easy. Just follow the steps below:

http://storybird.com/teachers/

StoryBird Instructions created by Sarah Ogden

Storybird Login Cards

A Fox Run Christmas

The teachers and students at Fox Run Elementary went all out this year decking the halls…literally. Check out this awesome display of holiday spirit. I used Photopeach to create this cool slideshow. It’s free and will embed in all blogs and your Teacher Web!

Appy Holidays!

Weekly Smart Challenges

___________________________________________________________

I often hear from teachers that they don’t have time to attend technology trainings due to tutoring or other departments requiring after school professional development.  I’m going to try something new this year by creating a weekly challenge for those that are interested in learning more techniques and strategies for using Notebook on their SmartBoard or Slate. Each week I will provide a video tutorial demonstrating a skill with an example.  I’d like for you to choose a particular TEK you will be teaching to your students in upcoming weeks and incorporate this strategy when introducing a concept or creating a technology workstation. You will need Notebook 11 installed on your computer to view each challenge. Here is a link to a free Notebook reader if you don’t have access to the program:

http://express.smarttech.com/#


Using More Than One App at a Time

While my husband was watching football on a Saturday afternoon (ugh), I decided to play around with this new app I found.  It’s not free ($4.99), but it’s crazy cool.  Corkulous is a great app for allowing students to explain Math, Science, or any other concepts they are learning in the classroom.  It allows you to upload images, create post-it notes to explain information and works great with other apps such as Doodle Buddy if you want to add personal drawings.  Here is an example I used to explain the water cycle:


The app also allows you to create a template as well as beginning a new project from scratch.  I uploaded some images in dropbox that I knew I wanted to include in this explanation.  When I finished my corkboard, I saved the image in My Photos on the iPad.  Then I opened Doodle Buddy, inserted my corkboard, and drew the arrows to represent the order of each process.  The last step was to save the image again and email it to myself.  It sounds tricky at first, but once you (and your kids) get the hang of it, the sky is the limit!