Creative Writing App Smash

Earlier this month I decided to participate in the Thinglink App Smash Challenge, facilitated by Susan Oxnevad. The goal is to use ThingLink as a presentation tool to demonstrate how to combine the functionality of two or more apps to create, publish and share content. It was more difficult than I thought because I had a hard time narrowing down which apps I wanted to use in my submission. I finally decided on Book Creator because of its cross-curricular nature, and its ability to include various types of media. Here is the flow of the lesson:

  1. Students choose a scene maker app to create an original visual writing prompt
  2. Students upload their image to Book Creator
  3. Add original composition using the text feature
  4. Add narration by recording
  5. Publish final project as e Book or movie

Thanks, Susan, for another great challenge! Click here to view all of the challenge submissions. Click here to view the App Smashing with Thinglink Webinar. 


Tool of the Month: Canva

All you have to do is scroll through my past blog posts and pages to realize I use Canva for EVERYTHING! I honestly don’t think I could do my job without it. If you’re not aware of Canva, it is a free graphic design tool that allows you to easily create images for a wide variety of uses. They just recently launched an iPad app for simple graphic design on mobile devices (My mind is spinning with all of the additional app-smashing projects I see in the near future). What makes Canva so incredibly simple is the hundreds of templates you can choose from to create anything from a simple image with text to a collage with multiple images and design elements. All you have to do is drag and drop your items onto your workspace. Canva also includes an entire section dedicated to design essentials: simple tools and techniques that guide you through the graphic design process. 

Another reason I love Canva is they don’t require a monthly or yearly subscription to use any of their premium images or backgrounds. If you would like to use one of their backgrounds, it’s just a one time fee of $1.00 each. 

Over the past 2 weeks, I’ve been introducing a group of 1st graders to Thinglink (my other go-to tool). I used Canva to create the initial image that the students would be adding tags to. Since it was their first experience with Thinglink, I kept it simple with just text. Later in the year, they will be uploading student created videos from their iPads. If you would like additional information on using Thinglink, check out my other blog post.

TEKS and Student Expectations: 8) Earth and space. The student knows that the natural world includes the air around us and objects in the sky. The student is expected to: (B ) observe and record changes in the appearance of objects in the sky such as clouds, the Moon, and stars, including the Sun; (C)  identify characteristics of day and night; 

Here are some other examples of how I’ve used Canva:
November Themed Technology Lessons

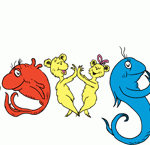
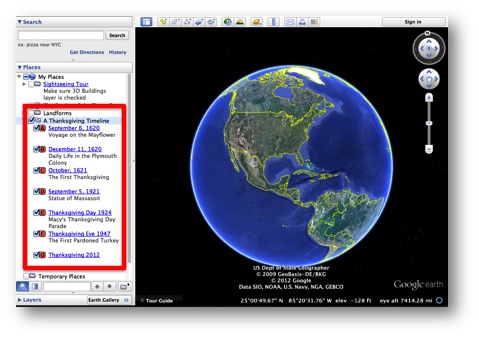
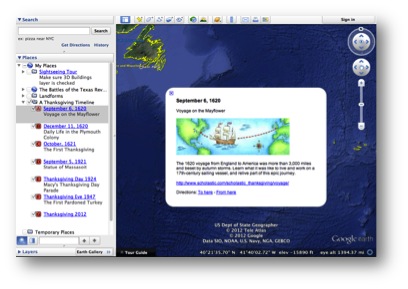
It’s a new month, which means a new holiday, which means new themed technology lessons. Of course, I have to begin by sharing a Thanksgiving Google Doodle from last year.  My favorite lesson you should try is the Thanksgiving Timeline virtual field trip using Google Earth. I taught this a few times last year and it will take at least 2 lab visits to complete.  It’s well worth the time investment!

To access the Google Earth tour:

  • Students login to Active Directory and open Google Earth
  • Go to File>Open and navigate to the Student Shared Drive
  • Click on the KMZ file named A Thanksgiving Timeline (teachers need to save the KMZ file to the student shared drive prior to teaching the lesson.)
  • You will see the tour on the left side of the screen. There are 7 place marks total with information and links to online activities.

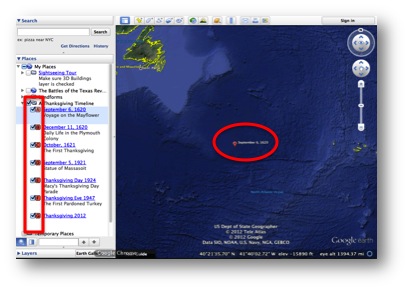
  • Double click on the red letter in the left pane to advance to each location. Double click on the red letter in the center to view the content within the placemark.

  • Advance through each placemark while completing each interactive until students reach the final destination where they describe family customs and traditions celebrated by their own families.
  • Students can document their learning by filling out a timeline graphic organizer or they can directly comment inside each placemark by right clicking and choosing properties. This will open the placemark for editing purposes. When complete, simply right click on the Thanksgiving Timeline folder located in the left panel and choose Save As.
  • Resources to download

The following list contains free sites and apps that you can use in the classroom or computer lab:

Tool of the Month: WeVideo

WeVideo is a web-based video editing tool that can be used on all devices – mobile, tablets, laptops, Chromebooks & desktop computers. Students can create from computers both at school and at home, as well as on their iPad from anywhere. WeVideo also integrates with Google Drive environment that students already are familiarized with, giving access to your files and exports all in one place. All the tutorials you need to get started on your digital storytelling journey can be found in the WeVideo Academy.

WeVideo Tips #1- Create a Digital Story

Thinglink for Educators

Thinglink is a free, easy to use online tool that allows you to make any graphic or photo interactive. Create multiple hot spots on specific parts of your image that link to a website, video, music, text, or audio file. Thinglink education accounts lets teachers and students store an unlimited number of images. ThingLink works on all modern web browsers as well as iPad, iPhone and Android.

Follow the directions below to create a free educators account for you and your students.

This slideshow requires JavaScript.


Once accounts have been created and you have printed the initial log in credentials provided by Thinglink, you can go in and change the username and passwords of each student to match their Google Drive credentials. Older students should be able to do this step by themselves.

This slideshow requires JavaScript.


Below is a slideshow with examples of how Thinglink can be used to support classroom instruction. Click on the arrows to advance through the presentation. Additional resources can be found at the bottom of the page.

Additional Resources:

Posted in Uncategorized Tagged