One of my personal goals this year is to become proficient in the use and navigation of Discovery Education content. I am very fortunate to work in a district that provides this wonderful resource for all students and teachers. My … Continue reading

One of my personal goals this year is to become proficient in the use and navigation of Discovery Education content. I am very fortunate to work in a district that provides this wonderful resource for all students and teachers. My … Continue reading
The Teacher Web product will be discontinued in NEISD prior to the end of the 2014-2015 school year and replaced with one or more alternative options from which teachers can choose to create their new web presence. Teachers will be provided with several weeks, if not months, of time to transition their current data from the Teacher Web product into the new website solution so that their data is not lost. On June 5, 2015, our Web Development team will redirect the current links from the Teacher Web product to the new landing page…creating a seamless transition in regards to how parents and students access the web content.
To access the NEISD Staff Web Page Login, go to the Employees tab on the NEISD home page and click on “Staff Web Pages”.
An external web presence is not mandatory, however, Technology Services will provide training and technical support for the three options listed below. The links to the tutorials are from Atomic Learning. Login with your full NEISD email address as your username and ne—— (6 digit employee number) as your password.
| Edmodo | Tutorials |
| Google Sites | Tutorials |
| Edublogs | Tutorials |
Please sign up in Eduphoria to receive more in-depth training for your preferred platform. Other web options such as Weebly, Smore, Bulb, Glogster, Wikispaces, or WordPress will be allowed, but training and technical support will be dependent upon the individual teacher. Contact your campus ITS for additional information.
To use one of these templates, simply click on “Use This Template” at the top of your screen.
To use one of these templates, please submit a help desk ticket with software/miscellaneous as the main category and Edublogs as the sub category. In the description box, please tell me which template you would like.
The expectations for maintaining a digital presence are limited to the NEISD staff landing page. However, creating a blog or website using one of the platforms mentioned above will transform your communication with parents and extend the walls of your classroom to include any area outside of your campus with Internet connectivity.
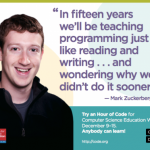
The week of Dec. 8-12 is the global Hour of Code initiative, a one-hour introduction designed to demystify computer science and show that anybody can learn the basics of computer programing. The promotional video that you can show your students in … Continue reading
Earlier this month I decided to participate in the Thinglink App Smash Challenge, facilitated by Susan Oxnevad. The goal is to use ThingLink as a presentation tool to demonstrate how to combine the functionality of two or more apps to create, publish and share content. It was more difficult than I thought because I had a hard time narrowing down which apps I wanted to use in my submission. I finally decided on Book Creator because of its cross-curricular nature, and its ability to include various types of media. Here is the flow of the lesson:
Thanks, Susan, for another great challenge! Click here to view all of the challenge submissions. Click here to view the App Smashing with Thinglink Webinar.
All you have to do is scroll through my past blog posts and pages to realize I use Canva for EVERYTHING! I honestly don’t think I could do my job without it. If you’re not aware of Canva, it is a free graphic design tool that allows you to easily create images for a wide variety of uses. They just recently launched an iPad app for simple graphic design on mobile devices (My mind is spinning with all of the additional app-smashing projects I see in the near future). What makes Canva so incredibly simple is the hundreds of templates you can choose from to create anything from a simple image with text to a collage with multiple images and design elements. All you have to do is drag and drop your items onto your workspace. Canva also includes an entire section dedicated to design essentials: simple tools and techniques that guide you through the graphic design process.
Another reason I love Canva is they don’t require a monthly or yearly subscription to use any of their premium images or backgrounds. If you would like to use one of their backgrounds, it’s just a one time fee of $1.00 each.
Over the past 2 weeks, I’ve been introducing a group of 1st graders to Thinglink (my other go-to tool). I used Canva to create the initial image that the students would be adding tags to. Since it was their first experience with Thinglink, I kept it simple with just text. Later in the year, they will be uploading student created videos from their iPads. If you would like additional information on using Thinglink, check out my other blog post.
TEKS and Student Expectations: 8) Earth and space. The student knows that the natural world includes the air around us and objects in the sky. The student is expected to: (B ) observe and record changes in the appearance of objects in the sky such as clouds, the Moon, and stars, including the Sun; (C) identify characteristics of day and night;
Here are some other examples of how I’ve used Canva:
It’s a new month, which means a new holiday, which means new themed technology lessons. Of course, I have to begin by sharing a Thanksgiving Google Doodle from last year. My favorite lesson you should try is the Thanksgiving Timeline virtual field trip using Google Earth. I taught this a few times last year and it will take at least 2 lab visits to complete. It’s well worth the time investment!
To access the Google Earth tour:


The following list contains free sites and apps that you can use in the classroom or computer lab:
Thinglink is a free, easy to use online tool that allows you to make any graphic or photo interactive. Create multiple hot spots on specific parts of your image that link to a website, video, music, text, or audio file. Thinglink education accounts lets teachers and students store an unlimited number of images. ThingLink works on all modern web browsers as well as iPad, iPhone and Android.
Follow the directions below to create a free educators account for you and your students.
Once accounts have been created and you have printed the initial log in credentials provided by Thinglink, you can go in and change the username and passwords of each student to match their Google Drive credentials. Older students should be able to do this step by themselves.
Below is a slideshow with examples of how Thinglink can be used to support classroom instruction. Click on the arrows to advance through the presentation. Additional resources can be found at the bottom of the page.
Additional Resources:
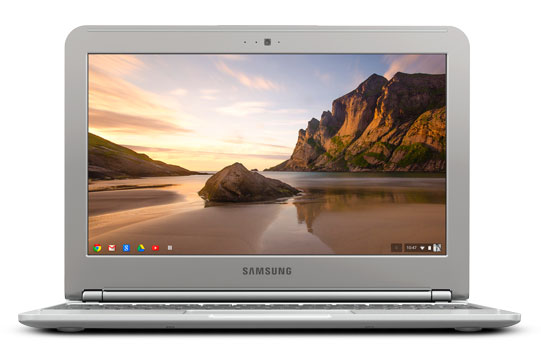
The Samsung Chromebook differs from a regular student computer in that it is only a portal to the web. It will not come with the traditional software you find on VDI workstations or on the student laptops/desktops. Users will not have access to Active Directory staff and student drives. You will use the district Google Drive account to login, and it will also serve as a workflow solution.
Click here for NEISD Student and Staff Google Drive login directions.
Google Classroom is now available as part of the Google Apps for Education Suite. Classroom is designed to help teachers create and collect assignments paperlessly, including time-saving features like the ability to automatically make a copy of a Google Document for each student. It also creates Drive folders for each assignment and for each student to help keep everyone organized.
Once logged into your Chromebook, go to classroom.google.com and sign in. Select teacher, and then click on join a class.
Enter the code o6rmgdk
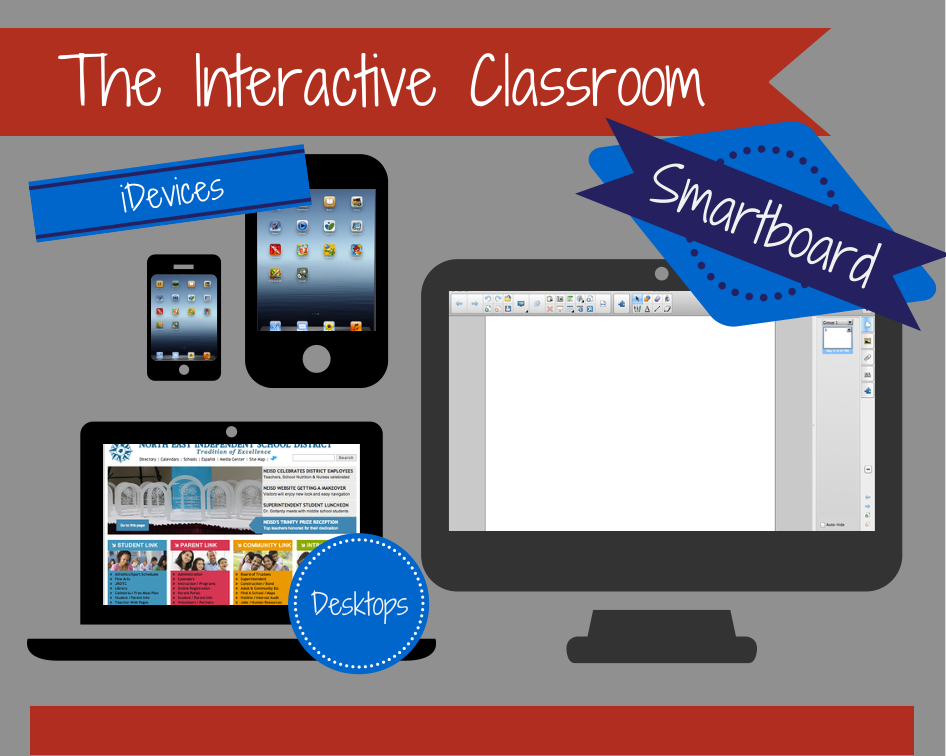
Imagine a bulletin board that plays videos created by your students, or a word wall that actually pronounces vocabulary words and provides definitions. Display student work that, when scanned by parents or other class members, gives a brief description of how it was made and learned concepts explained in their own words. Create a collaborative timeline of a historical event that comes to life. Easily gain instant insight into how well the class grasps a lesson. Create a video production area in your classroom to facilitate creation. All of these interactive ideas are possible with just a few digital tools and a creative mind. Below are a few examples of interactive projects that you and your students can create.
| Augmented Reality Tools | Augmented Reality Examples |
| QR Code Tools | QR Code Examples |
| SMARTboard Tools | SMARTboard Examples |
| Formative Assessment Tools | Formative Assessment Examples |
| Collaborative Wall Tools | Collaborative Wall Examples |
Aurasma Video Tutorial
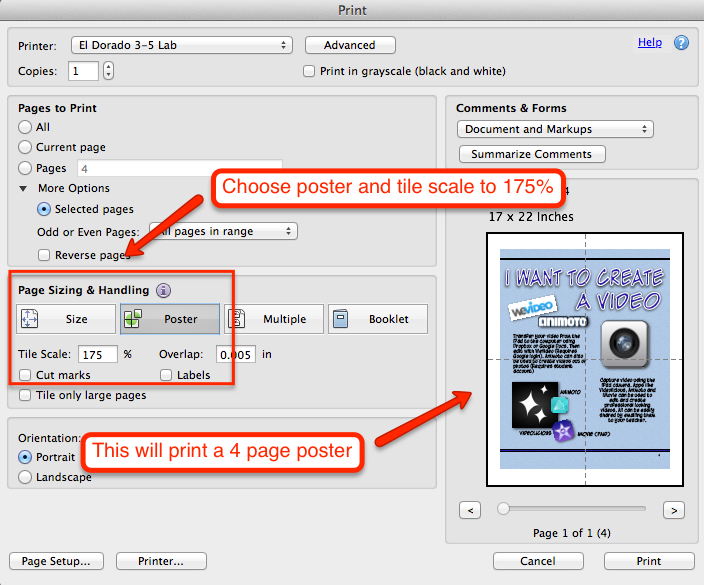
The biggest obstacle teachers face when trying to integrate technology is time. There aren’t very many opportunities during the day to explore new tools, think of ways to use them with the curriculum, or actually sit down to write a comprehensive lesson plan. Plus, the implementation of Standard V just adds to the already existing high levels of stress. Fortunately, higher levels of technology integration promote student choice, which means less planning on the part of the teacher. Over the summer, I worked on some computer lab posters that will help guide students in choosing the right tool for their project, and support teachers in their efforts for easier ways to integrate. I chose the theme of a graphic novel (created using Comic Life) to bring a little adventure into the computer lab. The first poster is attached to the door of the lab and asks, “What will you create today?” This represents the cover of the graphic novel. When they enter, each page of the novel gives them ideas and tools to use to accomplish their task. I encourage all teachers to bring their mobile devices to the lab each week, as adding the component of a camera adds to the diversity of projects students have as options.
Many teachers may find this amount of freedom somewhat daunting, especially if they are unfamiliar with how to use the software, web tool or app. This provides the perfect opportunity to bring collaboration into your lessons. Allow students to work together to figure out how the tools work, and then let them teach the rest of the class. You can also utilize a QR code tutorial section where students can view videos for quick instructions. I’ve included a link below to the PDF version of the posters. There are some that are very NEISD specific, but hopefully they will inspire you to create more personalized versions for your own students. I’ve also included directions for printing them poster size.
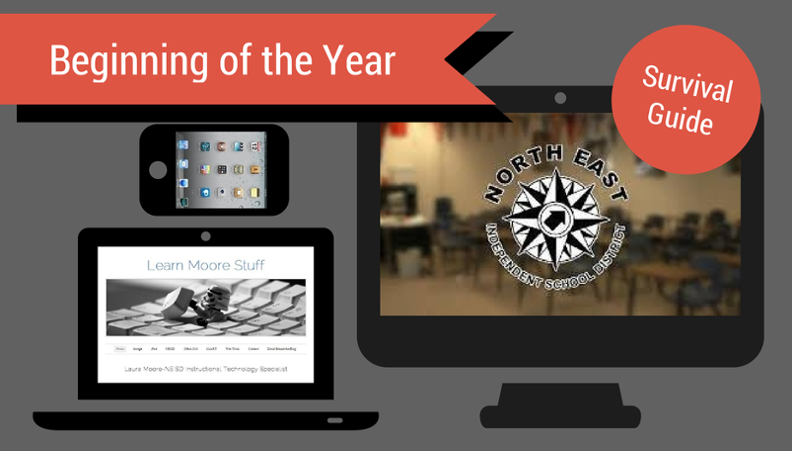
It’s that time of year again when teachers sadly put away the swimsuits and flip flops, and break out dress pants and heels. Hopefully, all of the Pinterest to-do projects were successful and the summer vacations provided a much needed break from stress. For the passionate teacher, a new year also brings that feeling of joy knowing that they will have the opportunity to positively impact the lives of students. That excitement is often coupled with anxiety when tasked with connecting all of your classroom technology and making sure it works properly for the first day of school. Have no fear, the BOY survival guide is here!
This guide contains video tutorials on how to connect NEISD issued equipment, resources for gathering student login information, lesson ideas to use in the computer lab, and much more! Click here to access the complete survival guide.
One of my favorite parts about summer is the opportunity to focus on my own professional growth. Last year, I participated in the Mapping with Google Online Course. This year, I chose to learn more about one of my favorite tools, Thinglink. Susan Oxnevad (@soxnevad) facilitated a 9 week challenge for teachers to learn to use interactive images to redefine learning in the classroom. This was a wonderful opportunity to expand my knowledge of this platform, learn new tools to use in conjunction with Thinglink, and connect and share with educators from all over the world.
Each challenge combined the curriculum with either a digital tool or a new way of using Thinglink. I was fortunate to try out Thinglink Video, a similar platform that allows you to tag video with digital content, making the viewing experience interactive. I also learned how to use tools such as Audioboo and Polldaddy to enhance an interactive image.
The final challenge was to create a channel of all the projects created over the summer. The free version of Thinglink does not allow you to embed channels, so I’ve created a Thinglink of my Thinglinks. You can see the full channel here.
Below are links to each challenge. It will walk you through the steps to create your own interactive interpretations for each topic. Click here to view the entire Thinglink Teacher Challenge showcase.
Intro: 3 Reasons to Take the ThingLink Teacher Challenge
Week 1: Get Started
Week 2: Design Your Digital Self
Week 3: Digging Deeper Into Vocabulary
Week 4: Create an Interactive Map
Week 5: Flip It with ThingLink for Video
Week 6: ThingLink UnPlugged to Extend the Classroom Walls
Week 7: Turn it Up a Notch with Sound
Week 8: Engage Students in Informed Decision Making
Week 9: Create a Portfolio Channel
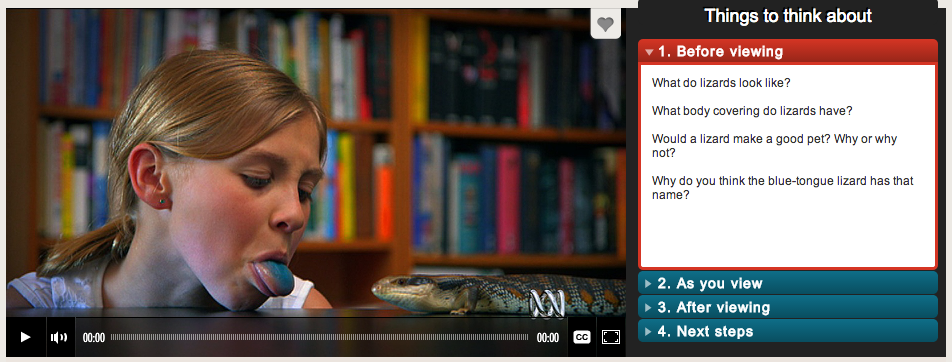
What do you do when insomnia kicks in on a Sunday morning? Explore Australian websites, of course. I found a gem called ABC Splash. In a nutshell, ABC Splash is affiliated with ABC News and Radio in Australia. They partnered with Education Services Australia to link hundreds of new learning resources directly to the Australian Curriculum. Everything is free and there is no need to register for an account. The first resource that caught my eye is a series of interactive videos that have related questions for each stage of the viewing process. My favorite is the blue-tongue lizard that Isabel keeps as a pet. It’s not only informative, but highly entertaining. See the full video here.
Some content on the site has been geo-blocked to Australia and territories. This is where the owner of the content has requested this to protect their content rights, so some videos will not play. However, I found many that align with Texas curriculum that you can use with your students.
Resources on this site support all areas of the curriculum. Digibooks are multimedia stories on a wide variety of topics. The videos won’t play due to the geo-block, however, the text is easy to read and supports all comprehension strategies. The Geography and History sections do pertain to Australia, however the Math section contains many interactive games to support the same skills we have in Texas. I really liked the Wishball series of games for place value.

“Test your understanding of decimal place value with numbers that include thousandths. Receive a starting number, such as 3.569, and work towards turning it into a target number, such as 7.832. Spin a random digit, choose its decimal place value and decide whether to add or subtract the random digit from your starting number. You can use the ‘Wishball’ to help you reach the target number. Try to achieve the target with as few additions or subtractions as possible.”- http://splash.abc.net.au/media/-/m/32408/wishball-thousandths
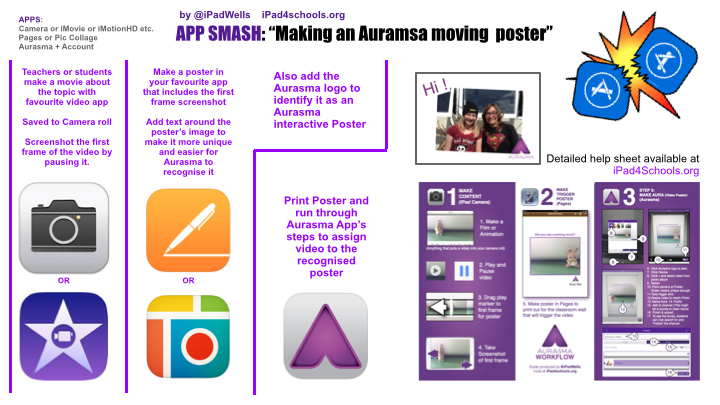
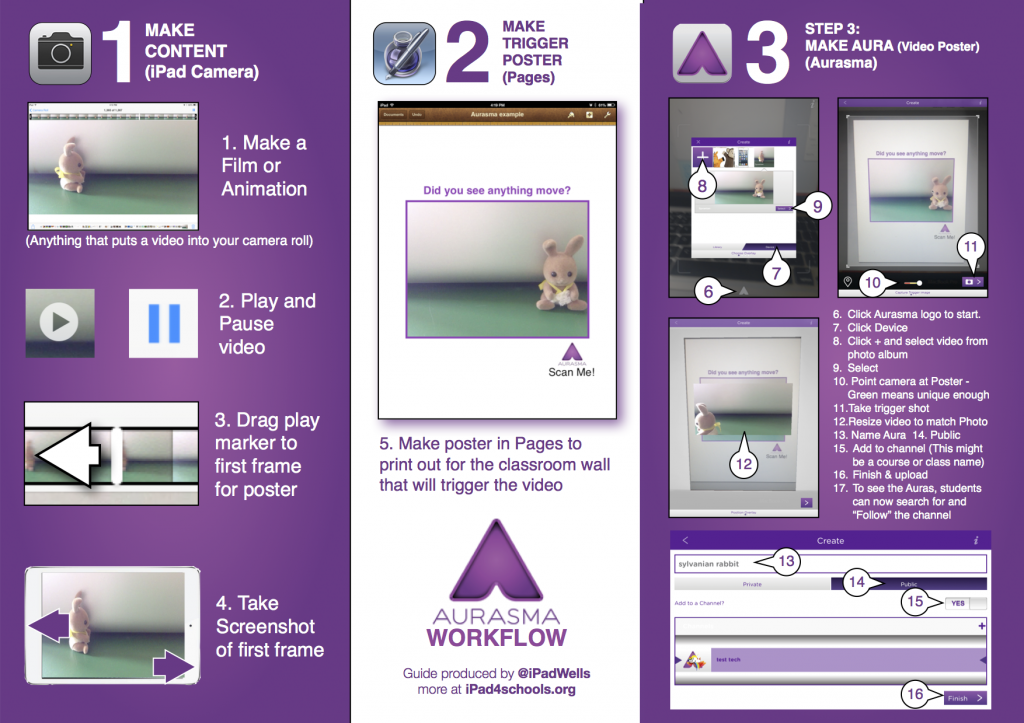
The days of student created posters using text and images alone are well in the past. We all know there is no such thing as the perfect app, which is why app smashing has become essential to the creation process. The same can be said for devices. Many tasks are more suited for a web-based tool, whereas others are perfect for the iPad. This year, one of my goals is to get teachers to bring their iPads to the computer lab so that students have the opportunity to “Device-smash” – using more than one device to create a student product. The above project is an example of such a task. The poster itself was created with Lucidpress, a web-based Google app similar to Publisher. Videos can be created on the iPad and then Auras (Using Aurasma) can be created by holding the iPad up to the computer screen to capture the trigger image from the poster. Interactivity is indicated in the lower corner of each image to let the viewer know which app to use for scanning. QR codes can also be used to combine additional projects such as Haiku Deck slideshows, which can be created on the web or on an iPad. The final product is not only an interactive digital poster that can be embedded on a website, but an interactive poster that can be printed and displayed on a bulletin board in the hallway.
Richard Wells, author of iPad 4 Schools, created some beautiful guides that walk you through making an aura using Aurasma. For additional ideas on making your classroom interactive, visit the Interactive Classroom Experience.
I’ve been a busy little bee this summer creating PD classes for the new school year. One of the tools I’m using to gather my resources is Bulb. Oh, how I love this site! Bulb allows you to organize content into collections, making it very easy for the user to separate content into different sections. I like it because you are not overwhelming the participant with lots of information at one time. This also makes the perfect tool for flipping lessons or collecting work for student portfolios. You can learn how to get started by visiting their Bulb for Teachers and Students.
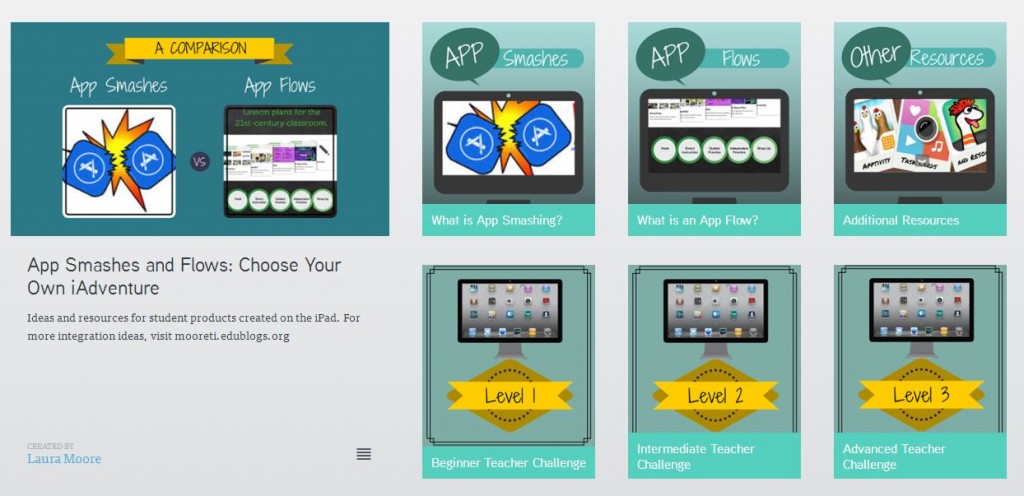
I’ve seen many differentiated resources on the Internet lately and decided to make one for an App Smashes and Flows class I will be teaching in August. I created a Bulb with 6 different sections. The idea is to introduce the concept of App Smashes and Flows, explain the differences between the two, and then allow the participants to choose their tasks based on their comfort level with the iPad. Bulb is the perfect tool for this purpose.
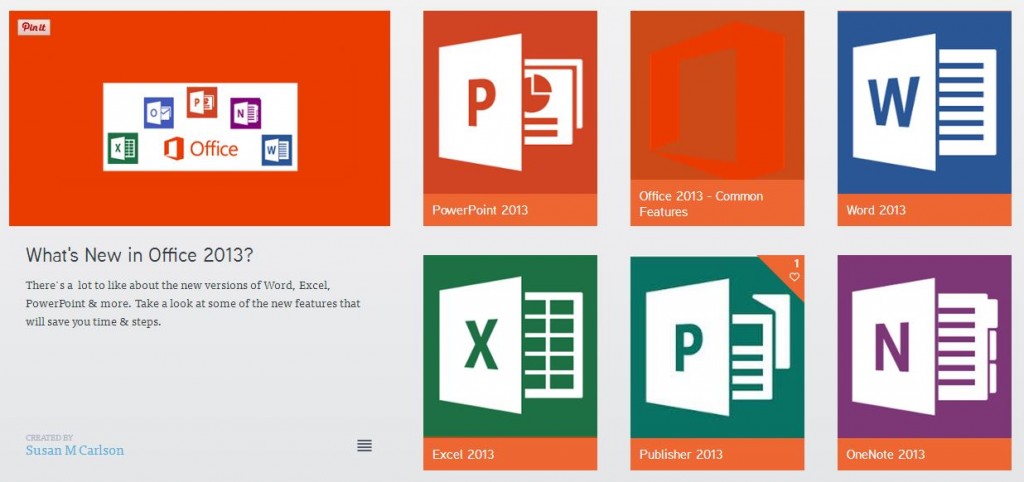
I’m not the only NEISD fan of Bulb. Sue Carlson, NEISD Instructional Technology Specialist, also used Bulb to curate her resources for our district’s What’s New in Office 2013? professional development course. Sue was able to create separate pages for each of the different software titles within the Office Suite. Participants are able to return to her Bulb for quick reminders, if needed.
Check out some of my other PD courses I’ve created using Bulb:


