Beginning with the 2013-2014 school year, NEISD teachers will be required to submit 1 student product that was created using technology. This initiative supports the Standard V requirements as outlined by SBEC. For the 2014-2015 school year, the number of product submissions will increase to 2. Below are some examples of Standard V lessons I have created with my campus grade levels. Many of these app/web tools are cross-curricular and can be applied to different TEKS or units of study. Please contact me if you have an idea for a lesson or need a similar task card to use with your students.
- Kinder Language Arts K.6A identify elements of a story including setting, character and key events: Facetalk Retelling
- 1st Grade Math 1.3 The student applies mathematical process standards to develop and use strategies for whole number addition and subtraction computations in order to solve problems: Farmyard Math
- 1st Grade Language Arts 1.9 A Describe the plot (problem and solution) and retell a story’s beginning, middle, and end with attention to the sequence of events: BME Summaries
- 1st Grade Science 1.10 Organisms and environments. The student knows that organisms resemble their parents and have structures and processes that help them survive within their environments. The student is expected to: investigate how the external characteristics of an animal are related to where it lives, how it moves, and what it eats. Animal Research Augmented Reality Project
- 1st Grade Social Studies 1.12 Government. The student understands the role of authority figures, public officials, and citizens. The student is expected to: (A) identify the responsibilities of authority figures in the home, school, and community; (B) identify and describe the roles of public officials in the community, state, and nation; Careers Research Thinglink Project
- 2nd Grade Science 2.5D Combine materials that when put together can do things that they cannot do by themselves such as building a tower or a bridge and justify the selection of those materials based on their physical properties: Videolicious Structures Project
- 2nd Grade Science The student knows that matter has physical properties and those properties determine how it is described, classified, changed, and used. Matter and Energy Storehouse Project
- 3rd Grade Reading SE 3.16 Students use comprehension skills to analyze how words, images, graphics, and sounds work together in various forms to impact meaning. Students will continue to apply earlier standards with greater depth in increasingly more complex texts: Big 6 Research Project-PDF, Big 6 Research Project-Word 2013
- 3rd Grade Math 3.11B: The student directly compares the attributes of length, area, weight/mass, and capacity, and uses comparative language to solve problems and answer questions. Perimeter Party
- 3rd Grade Reading 3.11 (A) read independently for a sustained period of time and paraphrase what the reading was about, maintaining meaning and logical order. 3.20 (C) write responses to literary or expository texts that demonstrate an understanding of the text. Digital SSR Using Symbaloo
- 4th Grade History 4.3 The student understands the importance of the Texas Revolution, the Republic of Texas, and the annexation of Texas to the United States: Google Tour Builder
- 5th Grade Science 5.8 Students will understand that weather represents the short term conditions of the atmosphere by producing a video that explains weather patterns of a specific region over a 3 week period: Videolicious Weather Project
More Examples from Jennifer Heine, NEISD Instructional Technology Specialist

Beginning with the 2013-2014 school year, NEISD teachers will be required to submit 1 student product that was created using technology. This initiative supports the Standard V requirements as outlined by SBEC.
My El Dorado peeps have been very busy planning with me and wanted to take this opportunity to share some of the projects they will be doing with their students. Many of these app/web tools are cross-curricular and can be applied to different TEKS or units of study. Please contact me if you have an idea for a lesson and need a similar task card to use with your students.
- Kinder Language Arts K.6A identify elements of a story including setting, character and key events: Facetalk Retelling
- 1st Grade Math 1.3 The student applies mathematical process standards to develop and use strategies for whole number addition and subtraction computations in order to solve problems: Farmyard Math
- 1st Grade Language Arts 1.9 A Describe the plot (problem and solution) and retell a story’s beginning, middle, and end with attention to the sequence of events: BME Summaries
- 2nd Grade Science 2.5D Combine materials that when put together can do things that they cannot do by themselves such as building a tower or a bridge and justify the selection of those materials based on their physical properties: Videolicious Structures Project
- 2nd Grade Science 2.5B The student knows that matter has physical properties and those properties determine how it is described, classified, changed, and used. Matter and Energy Digital Story
- 3rd Grade Reading SE 3.16 Students use comprehension skills to analyze how words, images, graphics, and sounds work together in various forms to impact meaning. Students will continue to apply earlier standards with greater depth in increasingly more complex texts: Big 6 Research Project-PDF, Big 6 Research Project-Word 2013
- 3rd Grade Math 3.11B: The student directly compares the attributes of length, area, weight/mass, and capacity, and uses comparative language to solve problems and answer questions. Perimeter Party
- 4th Grade History 4.3 The student understands the importance of the Texas Revolution, the Republic of Texas, and the annexation of Texas to the United States: Google Tour Builder
- 5th Grade Science 5.8 Students will understand that weather represents the short term conditions of the atmosphere by producing a video that explains weather patterns of a specific region over a 3 week period: Videolicious Weather Project
When creating Notebook files for teachers, I usually structure the lesson with the following 3 components: introduction, guided practice and checking for understanding. There are many sites that provide free content for each of these components. Study Jams! is a free site by Scholastic that provides interactive multimedia lessons to support Science and Math concepts. You can find over 200 topics and each works great on the SMARTboard. Click here to download an example Notebook lesson that supports area and perimeter. Below is a slideshow of the class I will be presenting at the SMART User’s Conference in June of this year (more information will be provided later). Each page contains links to interactive sites that support the curriculum for that particular area. Many of the websites featured are free and easy to use. Some are more complex and require a user guide for site navigation. You can find links to video tutorials and user guides in the attachments tab of the Notebook file. Click here to download the complete presentation.
This slideshow requires JavaScript.
What is a Virtual Desktop Infrastructure (VDI)?
In 2013, all NEISD computer labs were replaced with VDI machines using funds from the 2011 bond program. The biggest change teachers and students need to understand is the user may no longer modify the desktop appearance, including creating desktop shortcuts, saving work to the desktop itself or to the documents folder. Once a user is logged off, the desktop reverts back to a pristine image. The video below explains a VDI environment in detail.
Tips and Tricks for Navigating Through the Environment:
- Web Only Access vs. Campus Hub– Choosing web only access will allow the user to navigate through the web without logging into Active Directory. The user will not have access to district software, personal, or shared directories. However, the user will have printing capabilities if the campus has followed the directions to setup up a printer manually on the thin client itself. Web only access should NOT be the default method that students use because the Firefox browser does not have all of the plugins that many web 2.0 products require to work consistently and effectively. Students and staff will need to select their campus hub if they wish to save work for later use or use district deployed software.
- Logging On/Off– Students and teachers will use the same credentials used for Active Directory. Student login credentials can be accessed through the Employee Portal under Student Privacy Inquiry. *Note- Students can be logged into only 1 machine at a time, and there is no generic login.
- Desktop Applications– All software is located in the My Applications folder on the desktop. Right click on the desktop to access web links such as Gizmos, Google Drive, Library Shortcuts, Scholastic Next Generation (this is the new SRI solution), and Think Through Math. There is also a link to a VDI Resource that provides information about current software features, troubleshooting tips, functionality expectations, and new developments that are on the horizon. Movie Maker and Photo Story are no longer available. See below for some web-based alternatives.
- Printing– Printers are delivered to a user based on where they are physically sitting (according to the hostname of the actual machine itself). This means that if you are sitting in the library, you should only be able to see the library printers. If you are sitting in lab 18, you will only see the printers assigned to lab 18, and so on.
- Maintenance– Please do not update any software or utilities such as Java or Flash. All updates will be handled remotely by Technology Services. The physical upkeep of hardware, microphones, and headphones are a campus responsibility. Purchasing information for new equipment can be found on the Automated Pricing System.
- Saving Work– See directions below for saving work to the home directory. The Student Work Drop Folder that was available in the Novell environment will no longer be maintained. Use Google Docs if you need to save files for collaborative work. This can be accessed by right clicking on the desktop. Click here for more information on using Google Docs.
This slideshow requires JavaScript.
- Shutting Down Workstations– Units should be powered on using the button on the Thin Client, but should be powered off using the on-screen SHUTDOWN option. DO NOT USE THE POWER BUTTON TO SHUT DOWN THE THIN CLIENT. The only time the power button should be used is if the thin client is frozen and you are unable to power down or restart using the on screen options. VDI units should be powered on Monday mornings and can be left on all week as they do not generate much heat or use much electricity. They should be powered down using on-screen options on Friday afternoons. This allows Technology Services to conduct updates after hours during the week so that instruction is not disrupted.
- Accessing Student Home Directories– When logged in as a staff member, you can access all campus student home directories by going to Computer>(Campus Name)_Students. You can filter for individual students by typing their username in the search field located in the upper right corner.
Beginning of the Year Resources
Software and Web-Based Tools to Support Instruction
Hover over each image to see a linked tutorial on how to use that program. Many of the resources also include integration ideas. This is a great place to go if you are unfamiliar with our district software, or just need some additional ideas to support your instruction. Please contact your campus ITS if you would like assistance planning your next computer lab lesson.
 There are many free web-based tools available to support classroom instruction. I’ve chosen a few of my favorites to showcase specific lessons and ideas. For a complete list of web-based tools, visit my Web Resources for Educators page.

Rock the Lab
Rock the Lab is a website dedicated to providing students with TEKS-based lessons that follow the NEISD scope and sequence. Each grade level has their own page that contains a lesson for every content area. Teachers have a section of their own with video tutorials on how to create student accounts for various web based tools or log in to district resources like Google Drive and Discovery Education. All lessons can be used in your computer lab.
Lesson Examples
* Indicates required student or teacher accounts
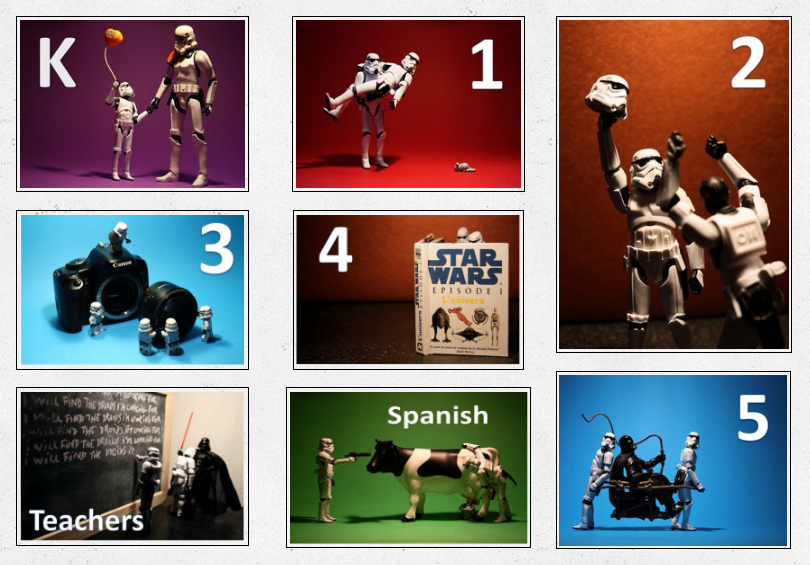
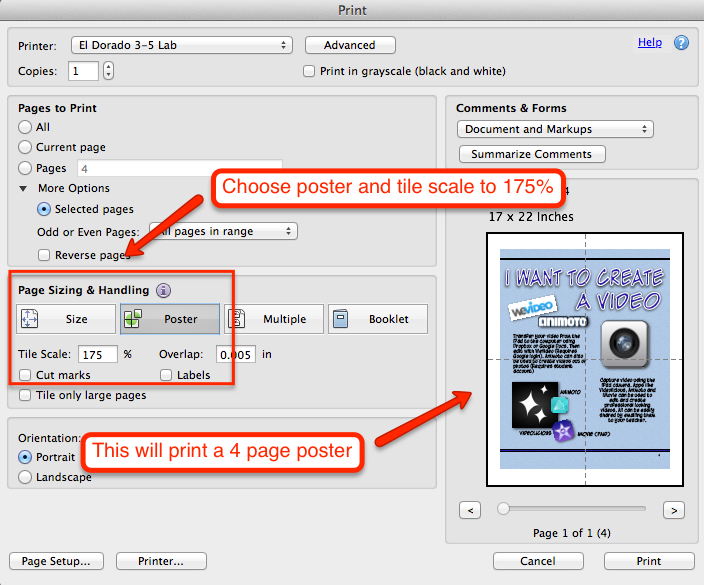
Computer Lab Integration Posters
Hang these posters in your computer lab to support higher levels of technology integration required by Standard V. NEISD Google Docs credentials required.
This slideshow requires JavaScript.
If you recently had your SMART board installed and don’t even know how to turn it on, then this is the class for you. Learn what all of those “cables and things” are hanging off the board, quick troubleshooting tips, and orientation tricks.
(A: NO experience with software at all) In this class participants will be introduced to the Notebook software and begin using a few of the features. Participants will explore the basic tools: tables, screen shade, pens (including magic pen), shapes, text tools, lines and their properties. Participants will be given the opportunity to register for the SMART Exchange and see how to search for TEKS specific lessons.
(B: I have used the software minimally.) I have opened the software and can use the pens, shapes, lines, etc. in the toolbar. I need to learn ways to easily put my curriculum into the Notebook software to make the lessons interactive and more engaging. In this class, participants will explore the object properties menu: clone, copy, paste, delete, locking, grouping, ordering, flipping, and infinite cloning and the role these properties play in creating interactivity. Participants will also have the opportunity to explore the Lesson Activity ToolKit, Gallery Content and recording features.
(C: I have used the tools and have a pretty good understanding of their uses, but want to explore the pre-made templates in the software.) Come and explore the Lesson Activity ToolKit and Gallery to create interactive activities. Participants will be given time to find and tweak lessons in the exchange, as well as to create their own lessons from scratch. This is a bring your own device class. Teachers need to bring their teacher laptops with the latest version of the Notebook software installed.
(D:I feel comfortable with all of the tools, but need some vision for how to use them to create interactive lessons) Come learn how to add interactivity to your lessons. Participants will explore 11 simple ways to add interactivity to a lesson (move to reveal, erase to reveal, change color to reveal, order objects, spotlight tool, table tool, identify and label, infinite cloner, pull tabs, dual page display, and the activity builder widget) and will have some time to tweak specific lessons using the learned techniques. This is a bring your own device class. Teachers need to bring their teacher laptops with the latest version of the Notebook software installed.
(E: I use the software ALL the time and feel comfortable with the basic tools and object properties, but know there are some features of Notebook software that are unknown to me ) Come learn how to record with Notebook, embed videos, create links, animate objects, and learn about a new feature, widgets! This is a bring your own device class. Teachers need to bring their teacher laptops with the latest version. of the Notebook software installed.
The Lesson Activity Toolkit for SMART Notebook software provides teachers with customizable tools and templates to help them easily create professional, interactive and engaging lessons. Teachers can start with templates for games, quizzes and sorting tables, or use the provided Flash tools to add interactivity to lessons. Once downloaded, the Toolkit is conveniently integrated into SMART Notebook software’s Gallery.
Lesson activities need to be designed for both content and presentation. Knowing a little about design and the best practices on how to build interactivity using Notebook software will help you create lessons that meet curriculum learning objectives and engage students. In this course you will learn 6 interactive reveal techniques that capture your students’ attention. A basic understanding of the Notebook interface is required.
The SMART Exchange offers a wide variety of already created SMART Notebook lessons for teachers. In this class you will learn how to search their database for exactly what you need, and how to modify lessons to increase the level of thinking while adding more interactivity.
This hands-on class will focus on free web-based tools that work perfectly on the SMARTboard. Over 30 sites will be featured for cross-curricular integration. Participants will also learn how to embed these sites within a Notebook file.
I often hear from teachers that they don’t have time to attend technology trainings due to tutoring or other departments requiring after school professional development. Below you will find weekly challenges for those that are interested in learning more techniques and strategies for using Notebook on their SMART Board or Slate. Each week I will provide a video tutorial demonstrating a skill with an example.
Example Lessons
Self-paced tutorials
- Using the Attachments Tab in SMART Notebook Software – Flash
- Using the Add-ons Tab in SMART Notebook Software – Flash
- Using the Google 3D Warehouse in SMART Notebook Software – Flash
Quick reference guides
- The Magic Tunnel Effect – PDF
- The Magnifying glass – PDF
- The SMART Notebook Page Recorder – PDF
- Creating and Customizing Pull tabs – PDF
- The random generator Tool – PDF
- The Balloon Pop Tool – PDF
- The Checker Tool – PDF
- The Erase to Reveal Effect – PDF