
If you are a regular reader of this blog, you know I obsess over certain tools I love. Thinglink is probably number 1 on my list and it just got even better! Last year, I participated in the Thinglink Summer VR Challenge and was introduced to their new 360° tag editor for making 360° images and VR content interactive. This particular feature of the platform is only available if you have a Premium Educator account. When I provide professional development opportunities for my teachers, I usually do not recommend purchasing individual subscriptions because I know that the money comes out of their pockets. This is one exception.
Thinglink is not just a tool. It is a supportive community designed to provide teachers with rich, interactive experiences that engage learners and immerses them into worlds they may not possibly be able to experience otherwise. When I see teachers and students using Thinglink to annotate content that demonstrates understanding of concepts, they are giddy. Seriously. Giddy. One of my favorite bloggers, Richard Wells (@EduWells), recently published a post about the impact of virtual reality in the classroom and how it can encourage empathy.
Below are the Thinglink current pricing options.
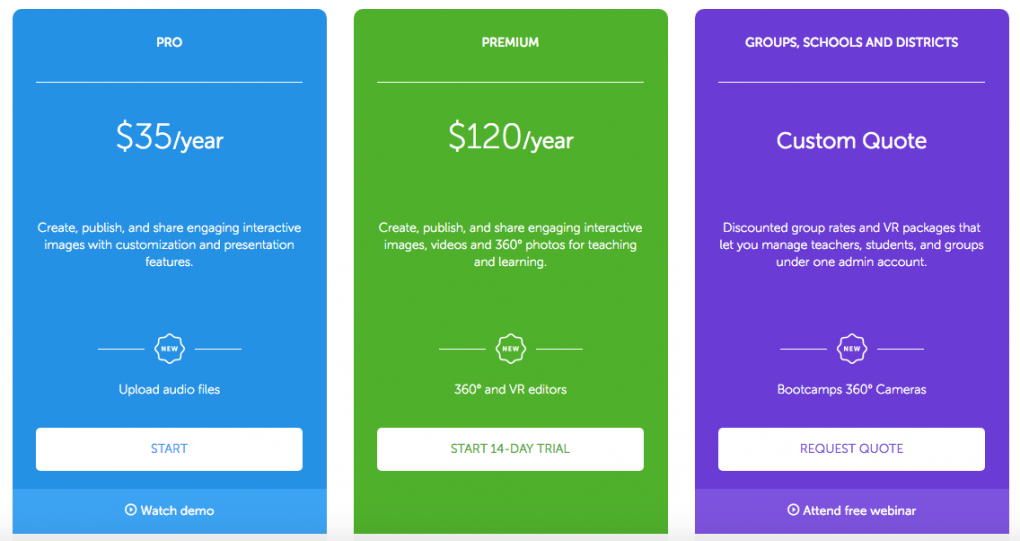
I recommend starting with the free 14 day trial so you can see for yourself how easy it is to navigate the interface. If the out of pocket cost is not an option, try approaching your campus administration or PTA/PTO for funding. Many campuses have even used allocated grade level or department funds.
One thing I struggled with as a new user of this feature was learning about 360° images, specifically where to get them and how to make your own. I’ve tried several apps and continue to go back to the same one: Google Street View on my iPhone. Here are the simple directions:
Create photos with an iPhone (Won’t work with an iPad because it won’t save to camera roll)
- Open the Street View app
.
- Tap Create +.
- In the bottom right, tap Camera
.
- Take a series of photos.
- At the bottom, tap Done
.
- Your 360 photo is stitched together and saved in the “Private” tab on your phone. The photo is also saved on your phone (unless you turned this setting off).
- Publish your 360 photo on Google Street View (you can blur faces or identifying information if needed)
Upload Image to Teleport 360° app on your iPad
- Open Google Street View on your iPad.
- Navigate to your public image and save to your camera roll.
- Open Teleport 360 and tap on Upload Media
- Tap Photo Library and tap on your 360 image
- Tap edit and start tagging using text, images, audio, video, embed html, or transitions
Here’s a quick video to show how easy it is to use:
If you would like to take your class on an immersive learning adventure to a specific destination, check out the photo pool from the Flickr 360 Equirectangular Group. Many photographers have given permission for their images to be used. Kathy Schrock’s Guide to Everything (and I mean EVERYTHING) also has a wealth of information and resources on the subject of virtual reality. Also, within the app itself is a growing collection of their own 360° image library.
Check out the Spotlight Speakers 17 Channel created by Susan Oxnevad (@soxnevad) to see examples of how educators are using this tool to support instruction.
Happy Tagging!